How to set up Slideshow
Web Content > Slideshow
Slideshow is usually being placed at the top portion of the store's homepage. Slideshow is commonly used for showcasing sales promotions, new arrivals and festive greetings.
To create a Slideshow,
- Go to Web Content > Slideshow
- Click New
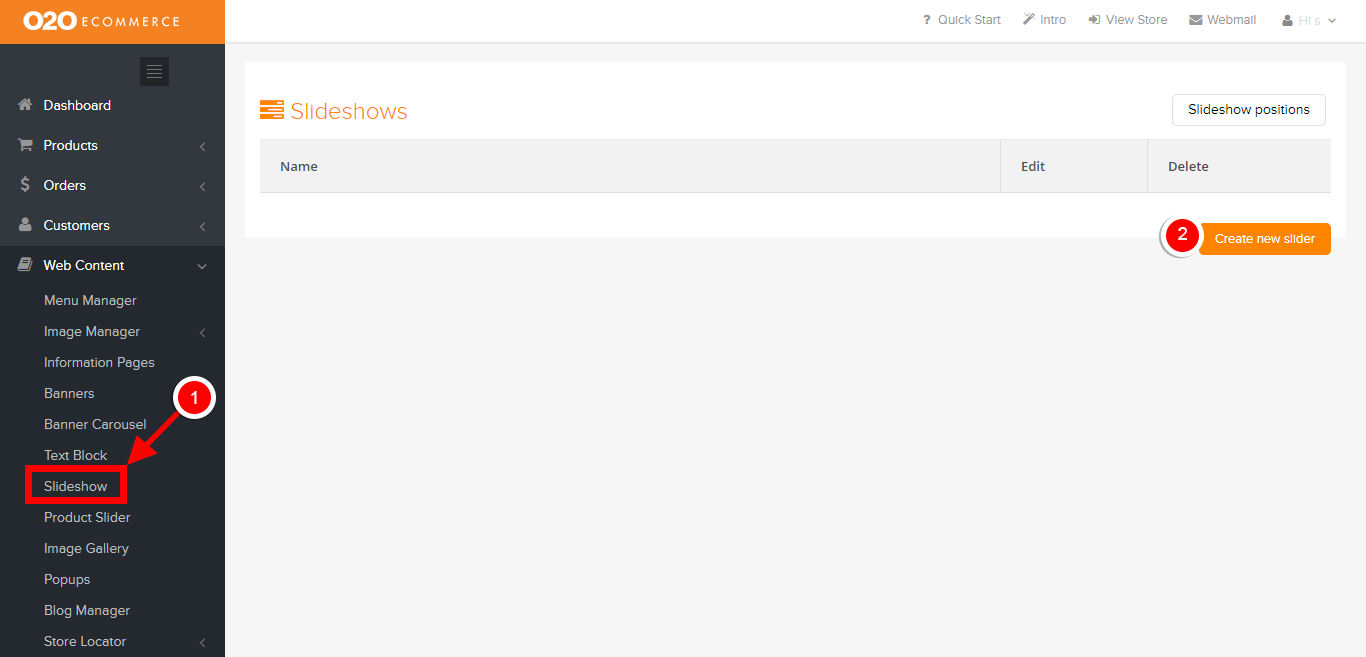
You will then be shown the following page.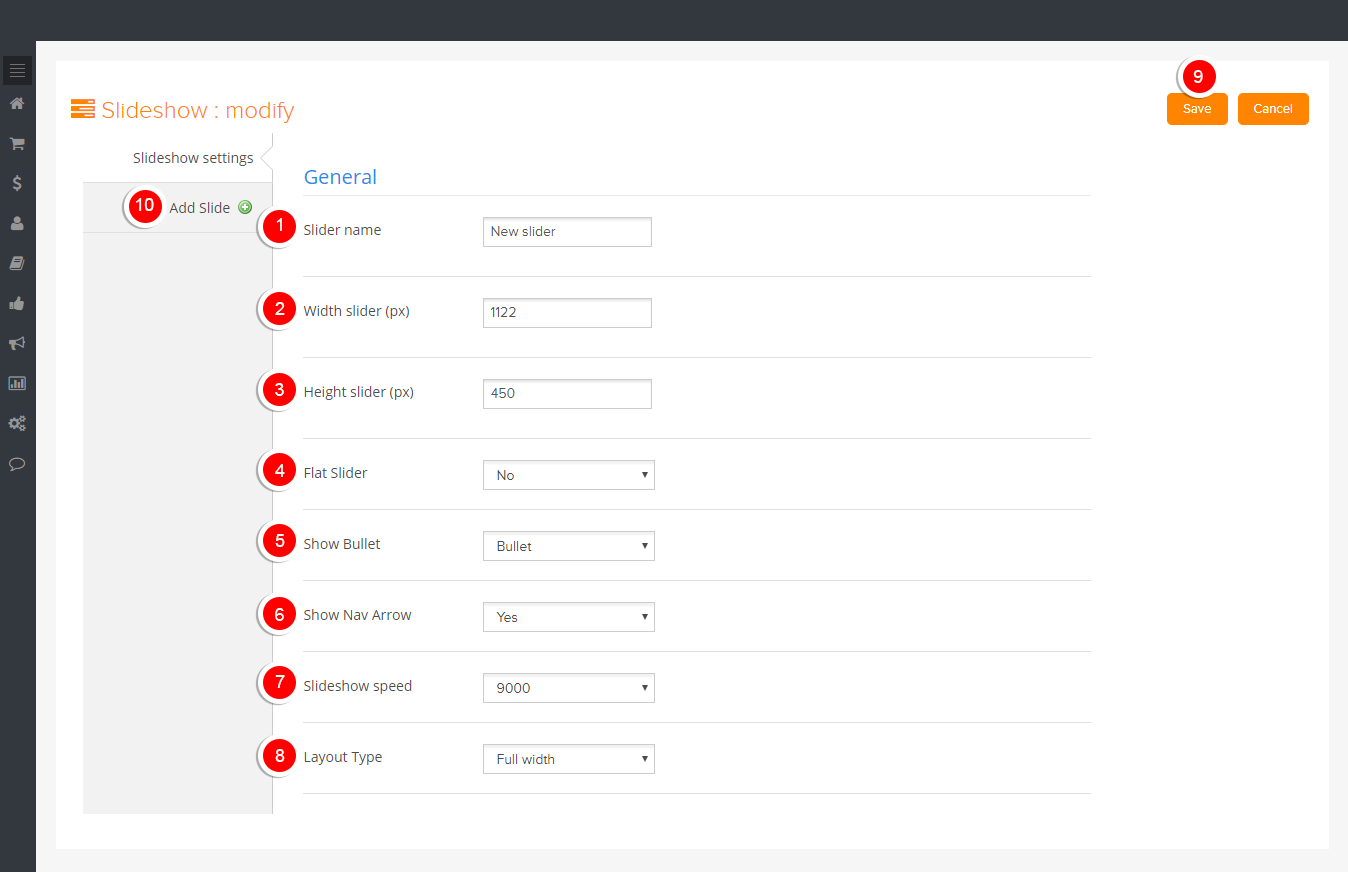
Descriptions :
- Slider Name
- Give a name for this Slideshow
- Slider Width
- Refer here for the banner width before creating any new banners so that the banners fit properly
- Slider Height
- Refer here for the banner height before creating any new banners so that the banners fit properly
- Flat Slider
- Choose yes for flat styled slider
- Show Bullet
- Select either Bullet, Thumbnails or None. This will be shown at the centre bottom of the Slideshow.
- Bullet
- Thumbnails
- Bullet
- Select either Bullet, Thumbnails or None. This will be shown at the centre bottom of the Slideshow.
- Show Nav. Arrow
- Select Yes if you want to display the navigation arrow on the Slideshow
- Slideshow Speed (ms)
- Adjust the Slideshow presentation speed here
- Layout Type
- Determine whether the horizontal length of this Slideshow (Fixed or Full Width)
- Fixed
- Full Width
- Fixed
- Determine whether the horizontal length of this Slideshow (Fixed or Full Width)
- Save
- Click to save and continue
- Add Slide
- Click here to add banners to this Slideshow


Upon clicking Add Slide, the following page will be displayed.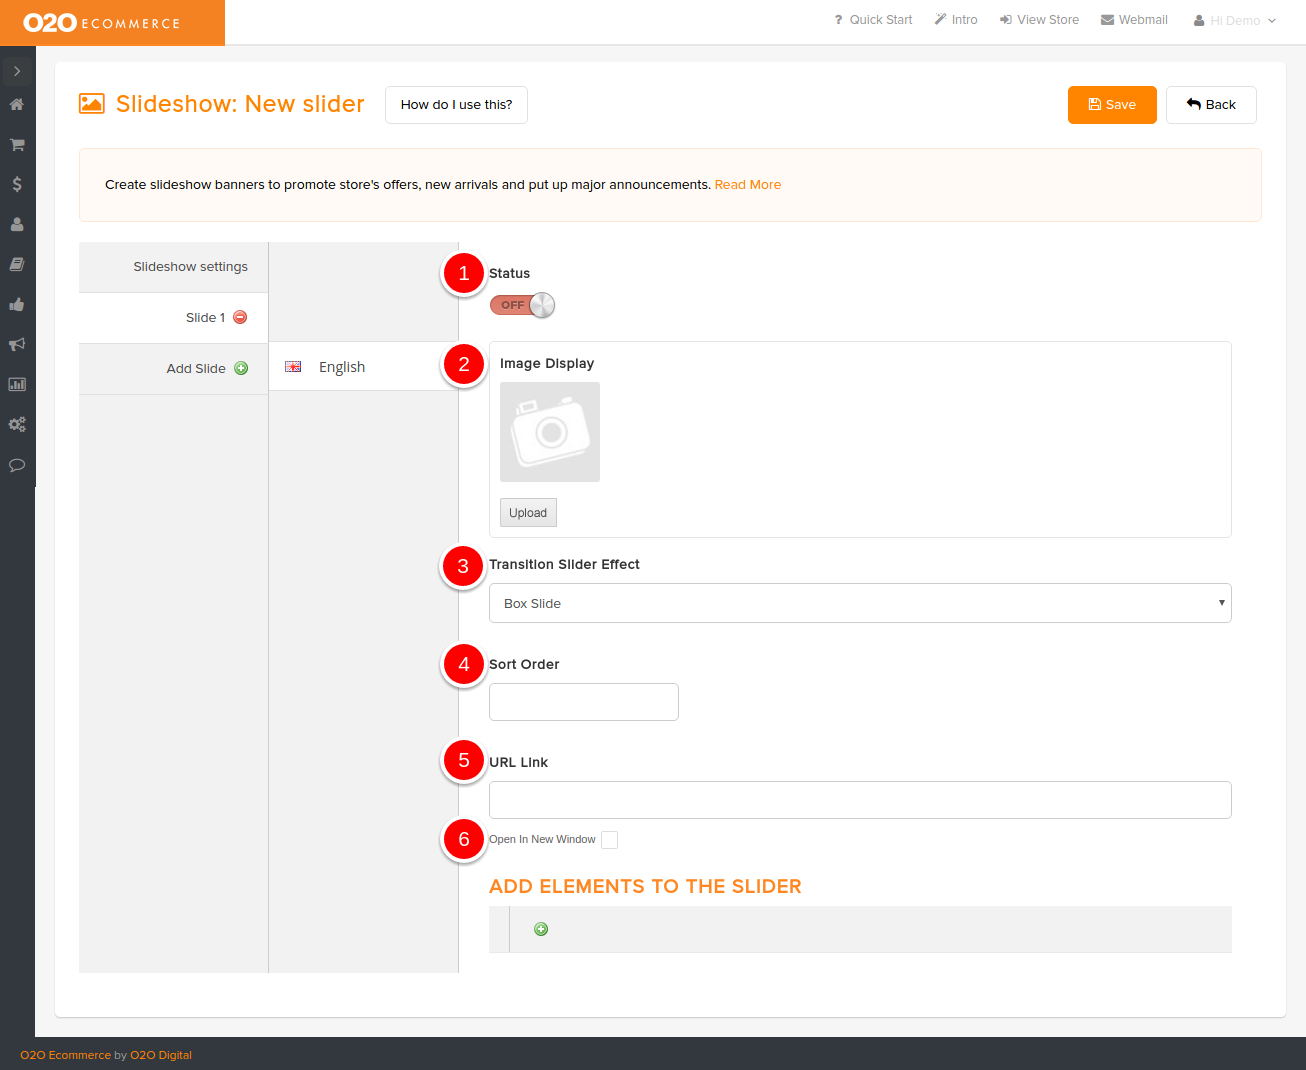
Descriptions :
- Status
- Turn the Status to On when you want to display this banner in the slideshow
- Image Display
- Browse and select the intended banner from the Image Manager
- Transition Slider Effect
- Determine the animation effect on how this banner is going to be presented in the Slideshow
- Sort Order
- Arrange the display sequence of banners in the Slideshow by assigning numbers in ascending order
- URL Link
- Enter the last part of the website link here (e.g. www.storename.com/men, you just key in "men" in the field), if applicable
- Check the box if you want to open the link in a new window
- Add Elements To The Slider (This is optional, see image and description below)
- Click Save
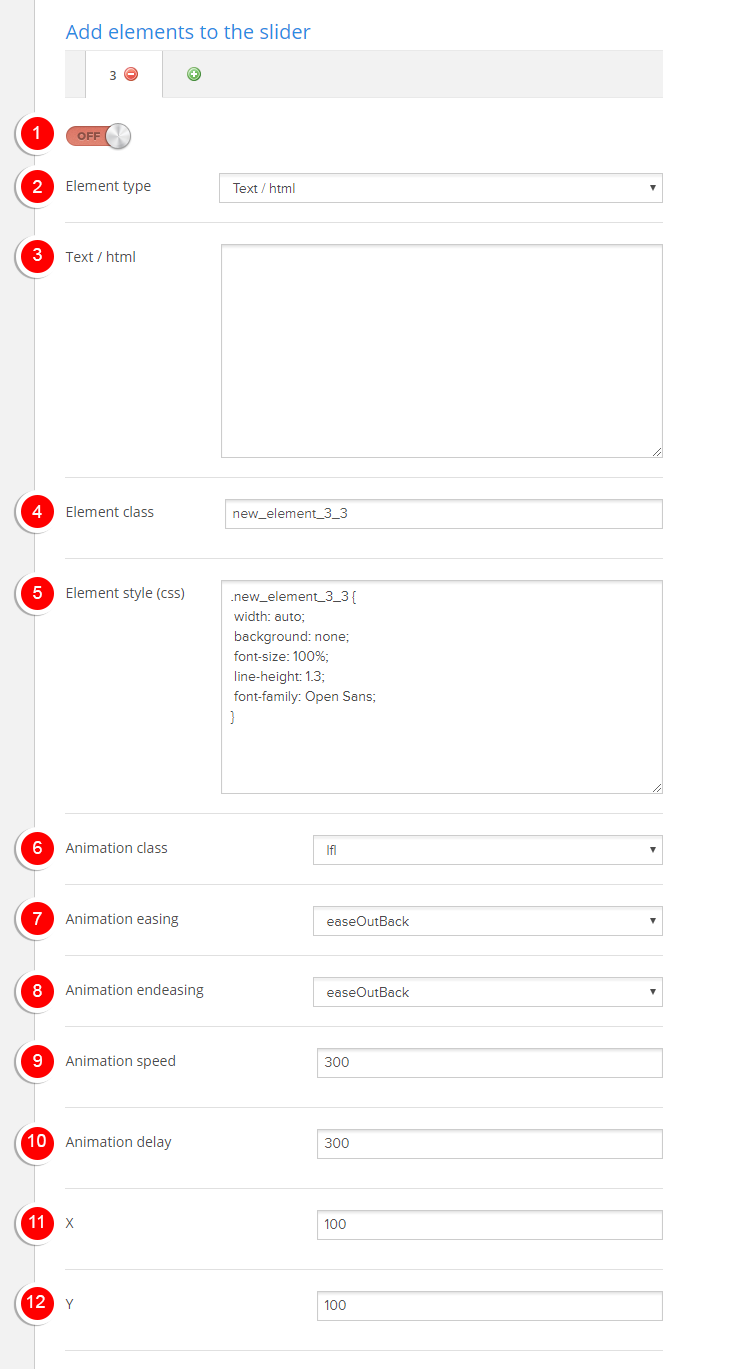
Descriptions :
- Click (+) to add a new elements to this banner
- Turn the Element Status to On to enable this element on the banner
- Select the desired Element Type (Text/HTML or Image)
- Input the content according to the selected Element Type
- Define the horizontal position of the element in Position X
- Define the vertical position of the element in Position Y
- Determine the type of Animation Class
- This will determine the moving direction and length of movement for this element.
- For example, if you choose Long From Right or Short From Right
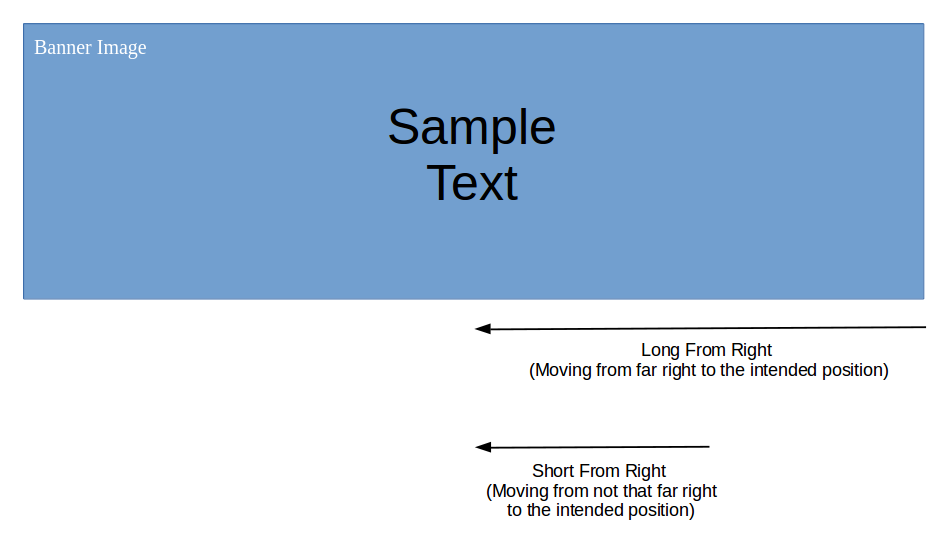
- For other type of classes, be it left, top or bottom, it will work the same way (just from different direction).
- Determine the type of Animation Easing.
- This will determine how the element will move in the first half of its journey.
- Preview and compare different type of Easing : Reference 1 and Reference 2
- Determine the type of Animation EndEasing
- This will determine how the element will move and stop in the second half of its journey.
- Define the Animation Speed in ms
- Define the Animation Delay in ms
- Advanced Element Styling is only for those who are familiar with CSS coding. This is used to further enhance the style of the element.
- Click Save to save all the changes
- Repeat the steps above to add more banners to the Slideshow
Then click Slideshow positions to configure the slider position
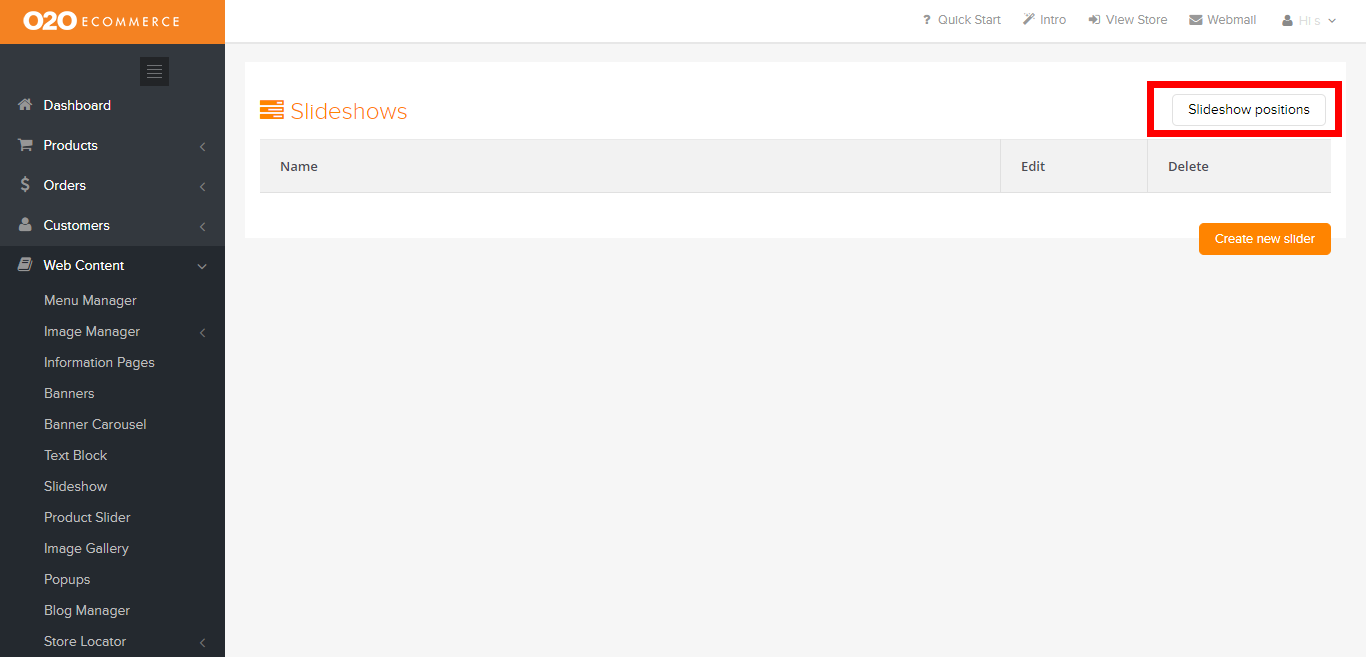
Upon clicking Slideshow positions, the following page will be displayed.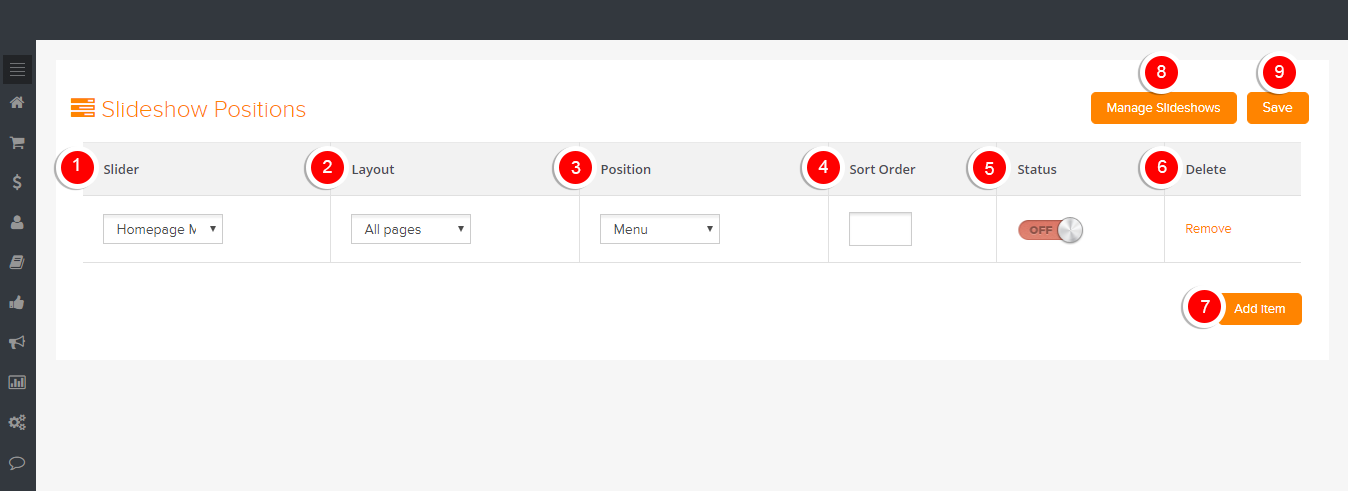
Description:
- Slider
- Choose which slider to configure its position
- Layout
- Choose which page to display the slider
- Position
- Determine the position of the slider in the chosen page
- Sort Order
- Arrange the display sequence of banners in the Slideshow by assigning numbers in ascending order
- Status
- Turn the Status to On when you want to display this banner in the slideshow
- Delete
- Click to delete
- Add Item
- Click to add more sliders to configure their position
- Manage Slideshow
- Click to go back to Slideshow setting page
- Click Save
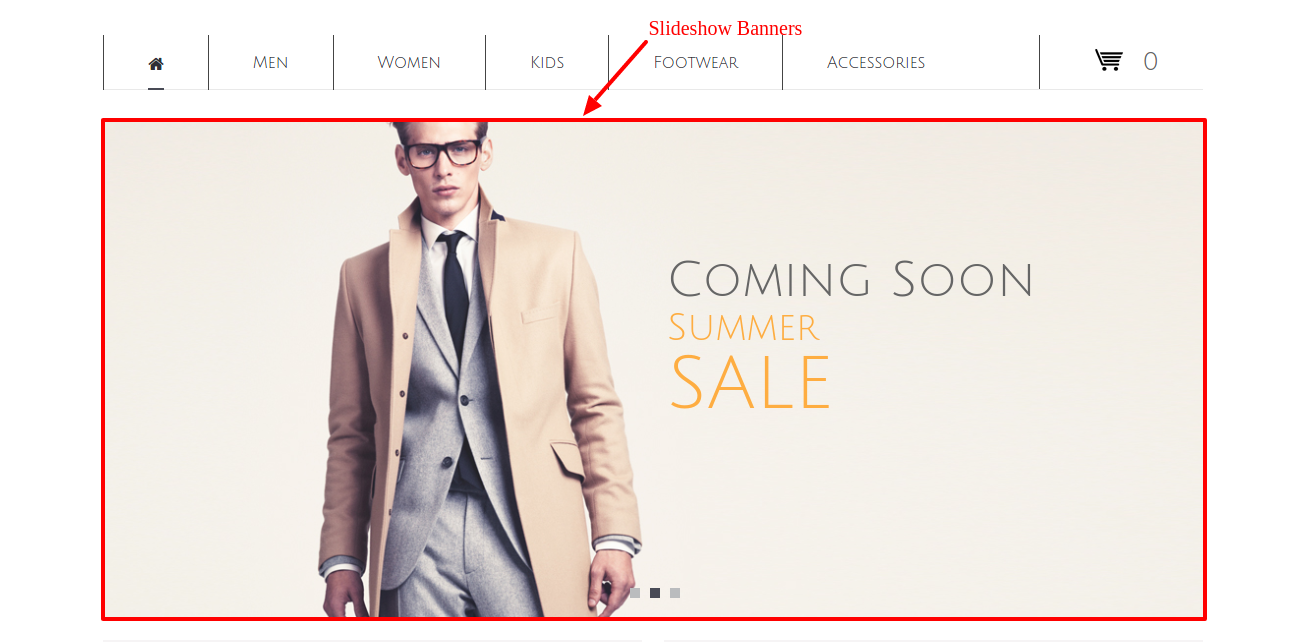
Sample Screenshot of Slideshow Banners in the store
Was this answer helpful?
Also Read
Powered by WHMCompleteSolution