Products > Product Settings > Product Labels
To create a text-based Product Label,
- Go to Products > Product Settings > Product Labels
- Click Add Label
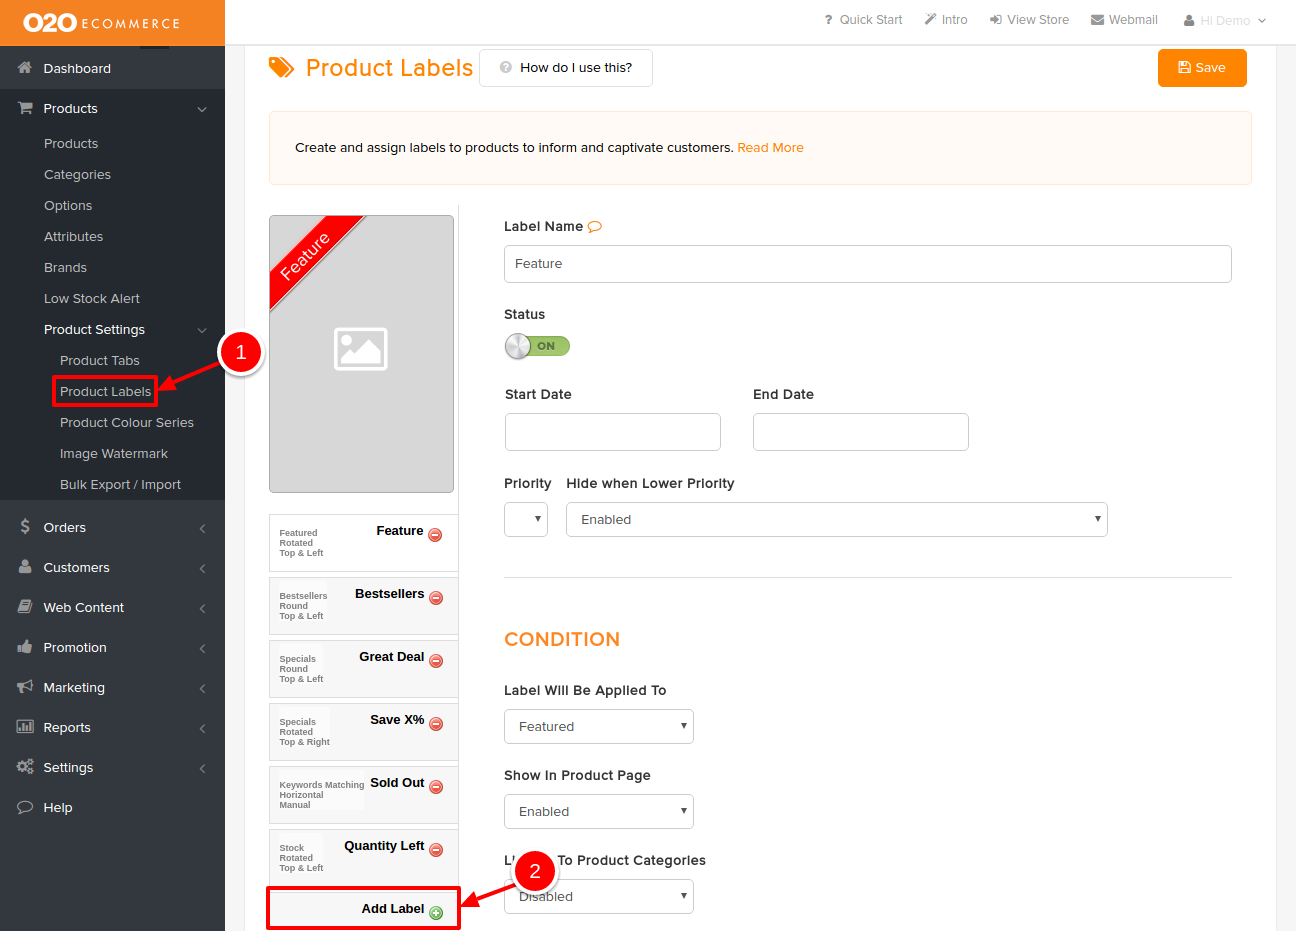
An empty input form will be displayed on the right side of the page. We will split the form to 4 parts.
Part 1
Descriptions :
- Label Name
- Give a name for this label for easy maintenance in the future
- Status
- Enable/disable this product label
- Start Date
- Set a start date if applicable
- End Date
- Set an end date if applicable
- Priority
- Determine the importance level of this product label (3 - Highest Priority ; 1 - Lowest Priority)
- Hide When Lower Priority
- Determine whether this product label should be hide when there is another higher lever priority product label being assigned to the same product
Part 2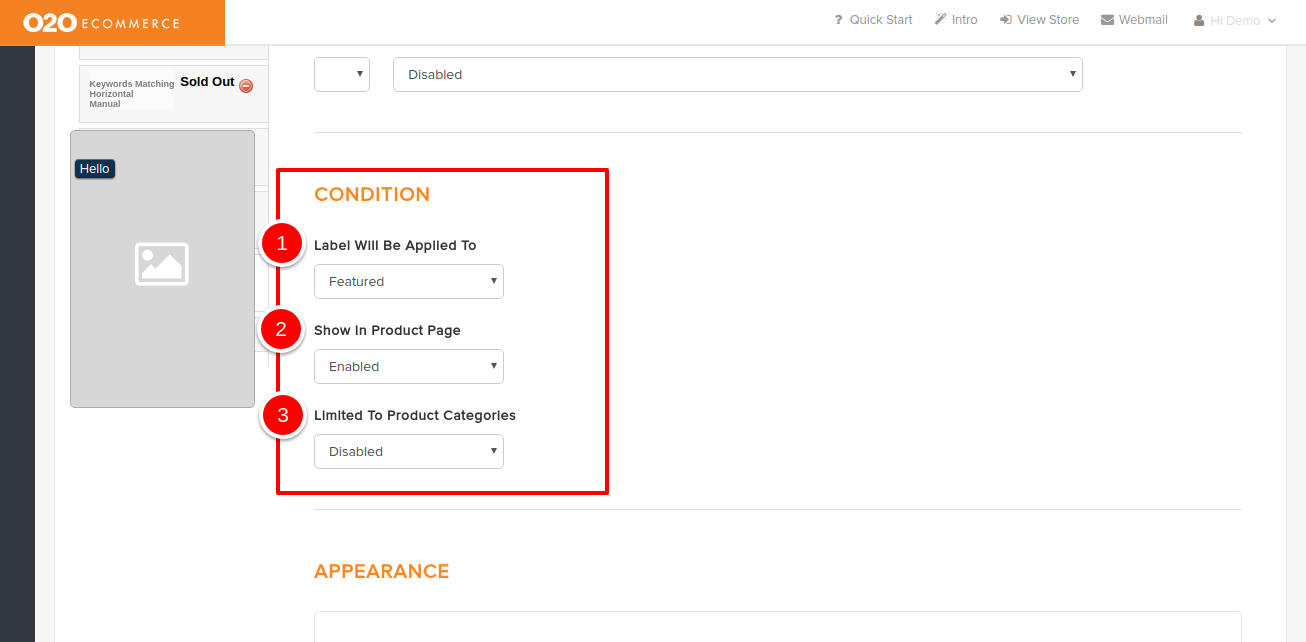
Descriptions :
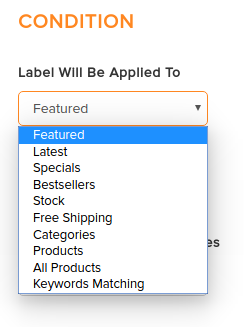
- Label Will Be Applied To
- Select where this product label will appear in from the drop-down menu. For some of the selections, you are required to input further information. Please do so accordingly.
- Show In Product Page
- Enable this if you want to display the product labels in the product page
- Limited To Product Categories
- Disable this if you do not want to limit the display of product labels only in categories pages
Part 3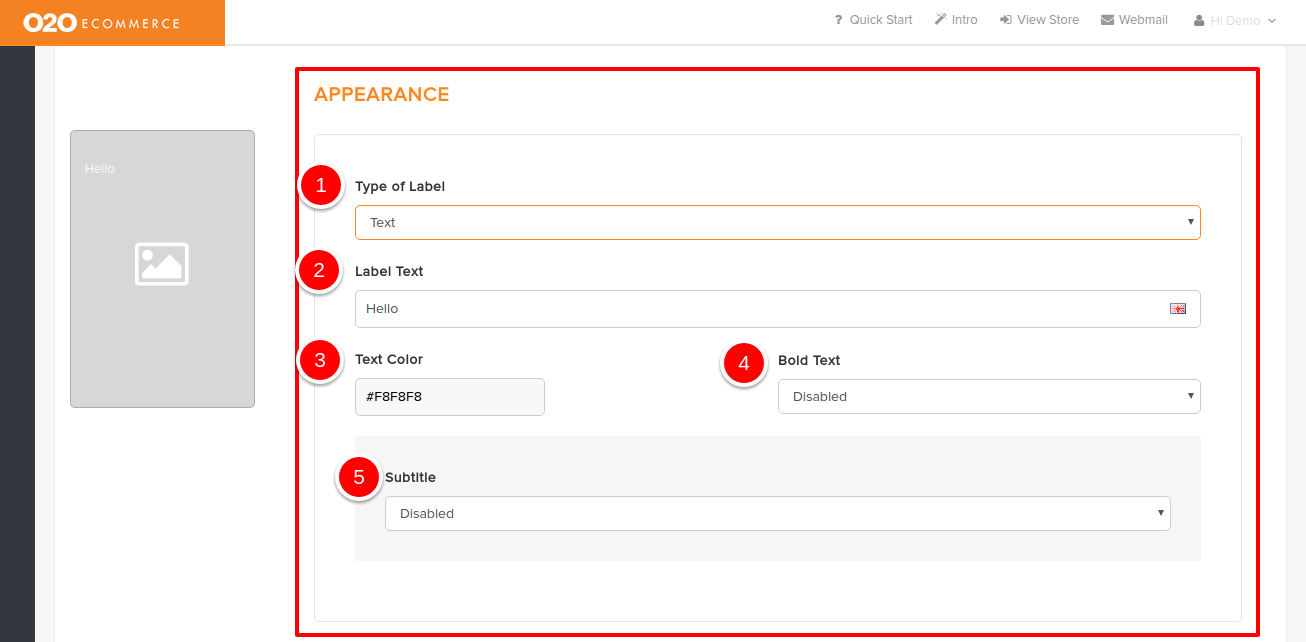
Descriptions :
- Type Of Label
- Select the type of product label from the drop-down menu (Text-based or Image-based). For this case, we will select Text-based and its relevant field will be displayed.
- Label Text
- Enter the desired text for this label
- Text Color
- Select the desired color or enter the desired color code for the text
- Bold Text
- Enable this if you want the text to be bold
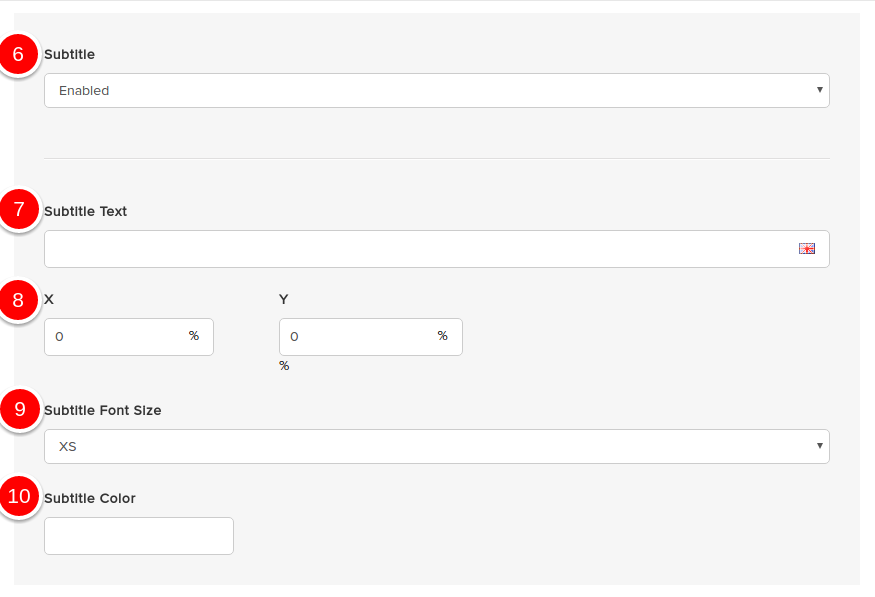
- Subtitle
- Enable this if you want to insert a subtitle to the text in your label
- Assuming that you enable the Subtitle
- Subtitle Text
- Enter the desired subtitle text for this label
- X / Y
- Specify the horixontal (X) and vertical (Y) position for the subtitle
- Subtitle Font Size
- Select the intended subtitle font size from the drop-down menu
- Subtitle Color
- Select the desired color or enter the desired color code for the subtitle text
Part 4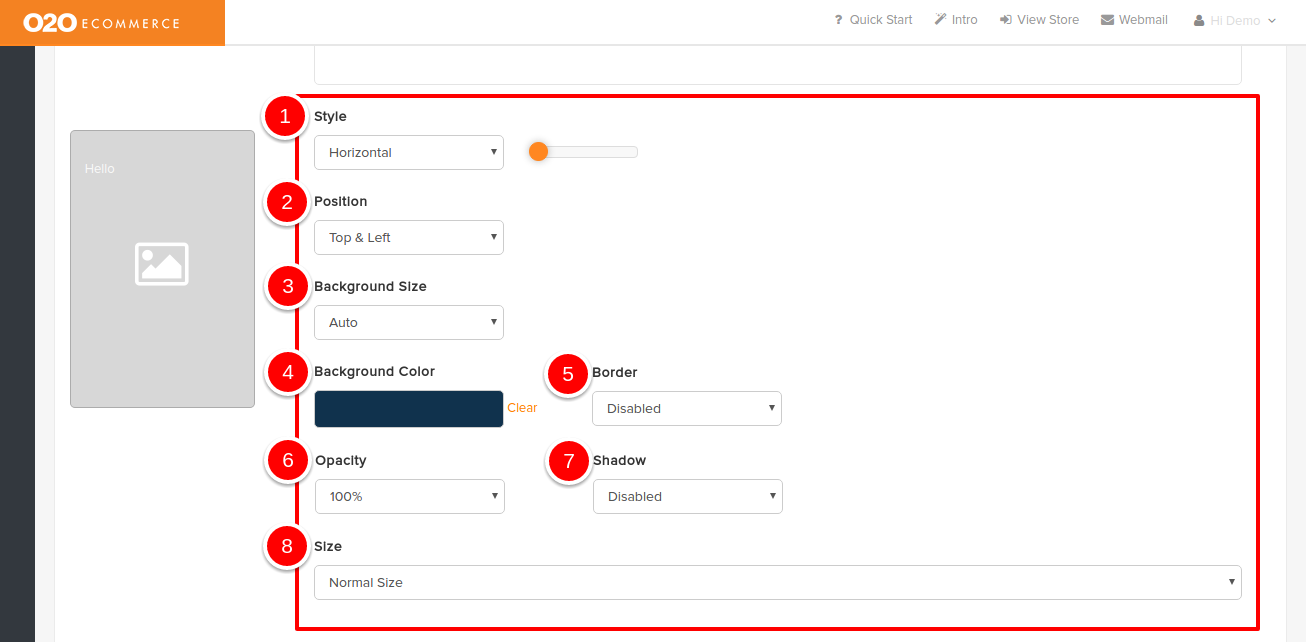
Descriptions :
- Style
- Determine the style of the product label from the drop-down menu. Adjust the horizontal bar beside it to set the intended label size.
- Position
- Set the position of this product label on the product image
- Background Size
- Determine whether you want the label background size to be adjusted automatically or manually
- Background Color
- Select the desired color or enter the desired color code for the label background color
- Border
- Enable this if you want this label to have a border
- Opacity
- Set the opacity level for this product label
- Shadow
- Enable this if you want this label to have a shadow effect
- Size
- Determine the text size of the label
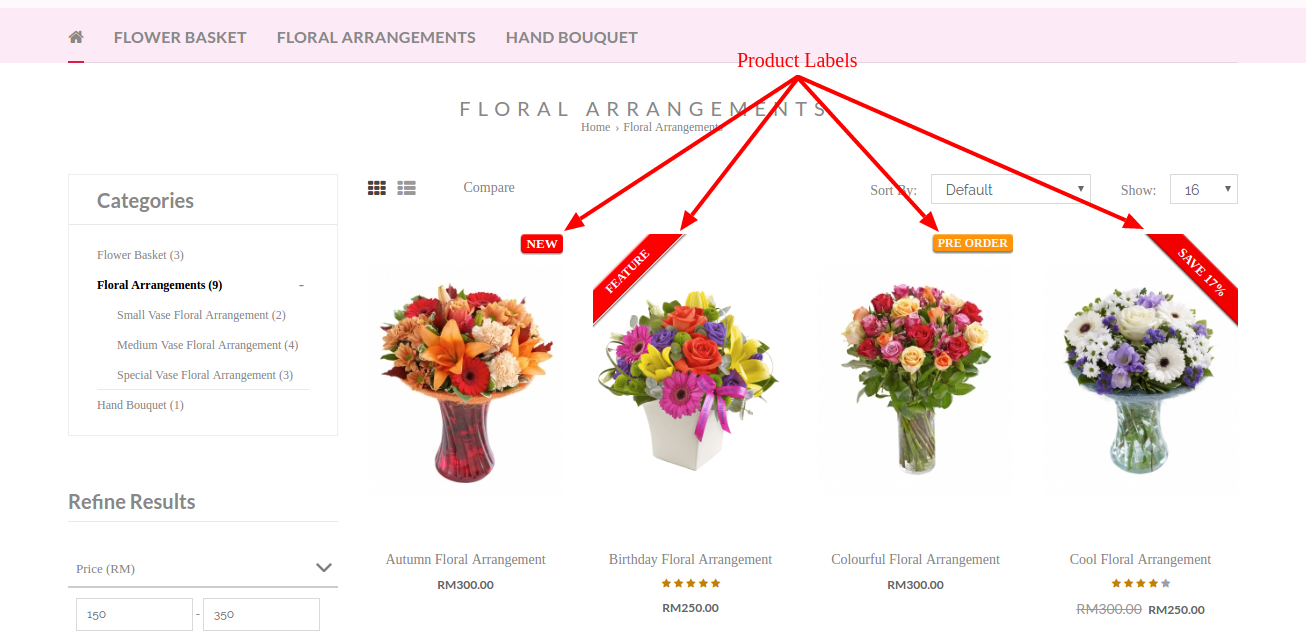
Sample Screenshots of Product Labels in the store