How To Register Name Server In MYNIC
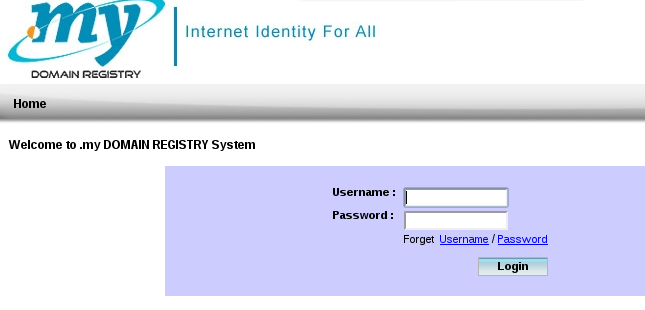
1. First browse to the Mynic (.my domain registry)technical page: https://web.domainregistry.my:7002/Mynic-ViewController-context-root/faces/PB/UserLogin.jsp
and log into using your Mynic user and password.
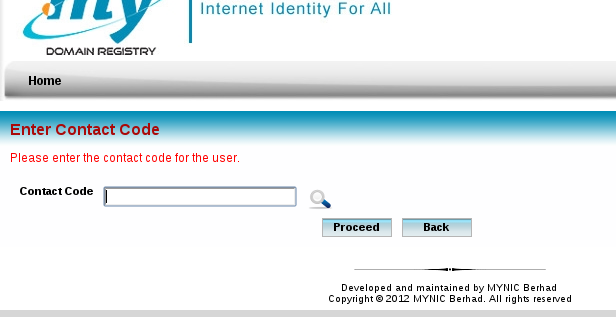
2. Insert your Mynic contact code which domains registered under it and proceed.
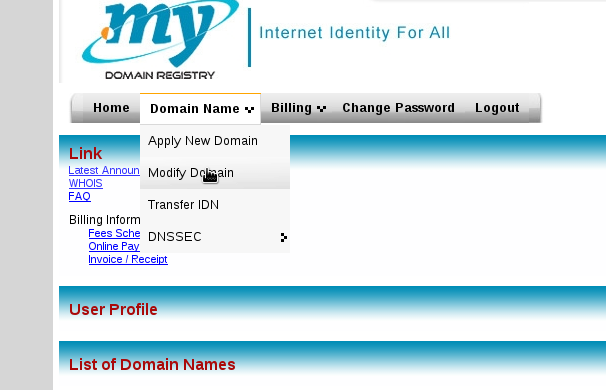
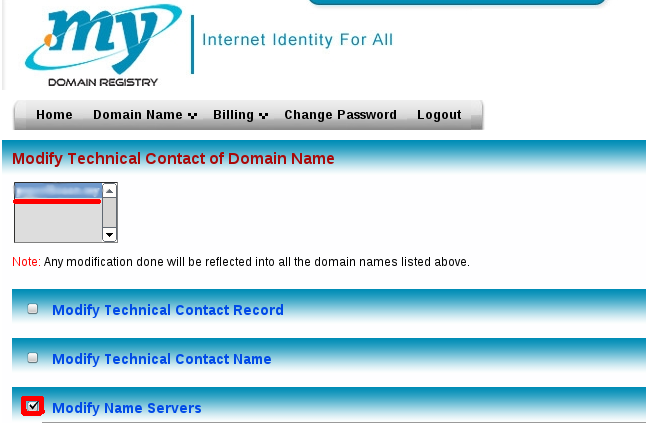
3. Next on the main page, click on the “Modify Domain” under the “Domain Name” tab.
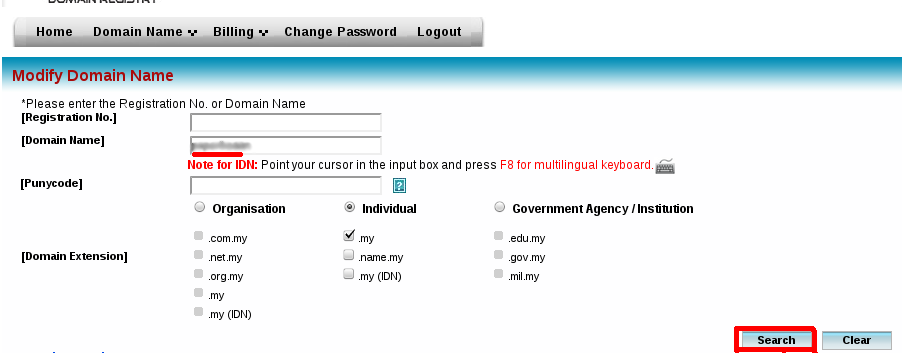
4. On the domain modify page, insert any domain name which registered under the contact code and and search for the domain name.
5. On the search result, check on the ‘Select’ box of the domain and click on ‘Modify’.

6. Then, select on the domain name and check on the ‘Modify Name Servers’ box. Wait for the ‘Modify Name Servers’ content to come out.
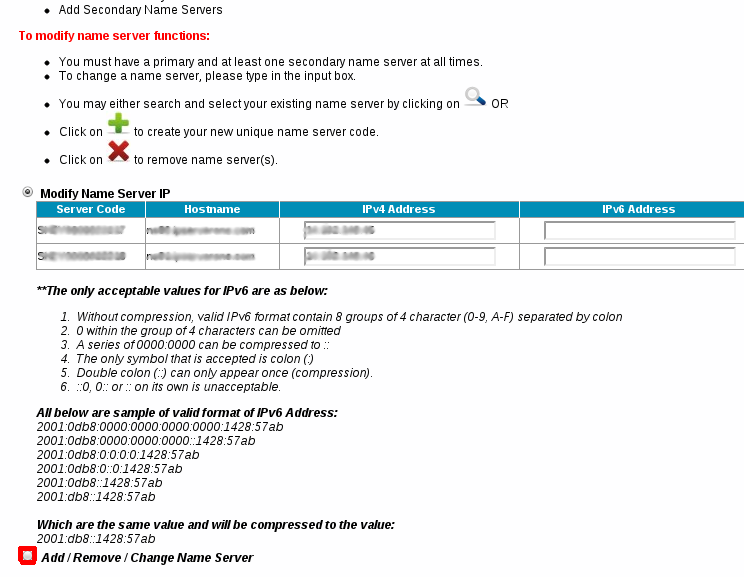
7. Next, check on the ‘Add / Remove / Change Name Server’ box and wait for the content to come out again.
8. After the contents came out, click on any
 icon to create your Name Server code.
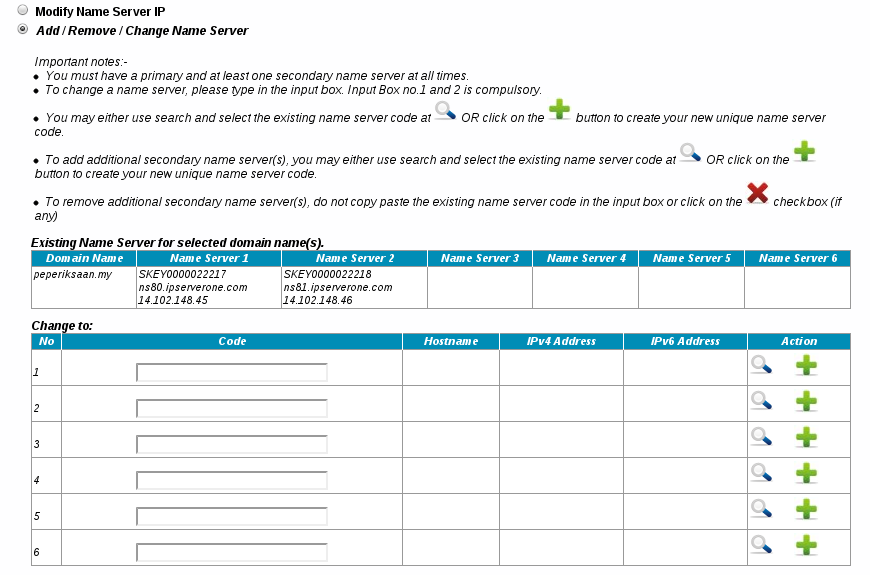
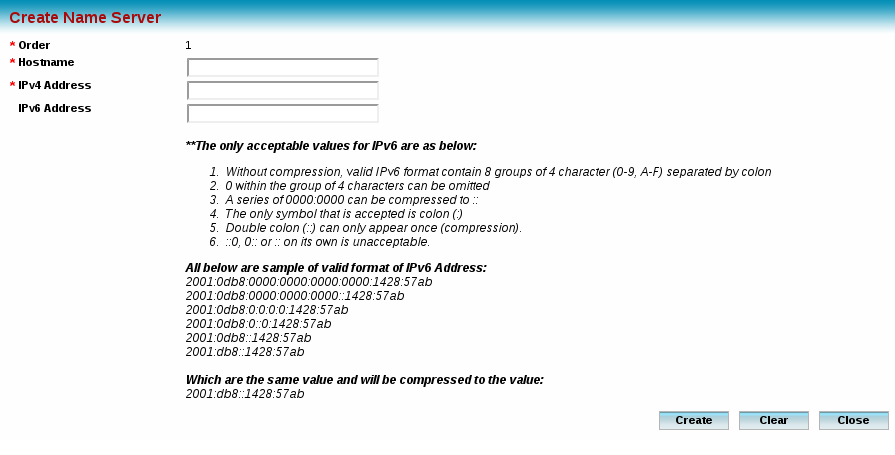
9. A pop up browser will appears and insert the ‘Name Server’ and IP address of the name server that you wish to create. Click on ‘Create’ after inserted the details and a confirmation of Name Server code created message will come out.
Was this answer helpful?
Also Read
Powered by WHMCompleteSolution