To create an Event Timer
- Go to Promotion > Event Timer.
- To add Event Timer, click on Add Item top right of Event Timer Cart page.
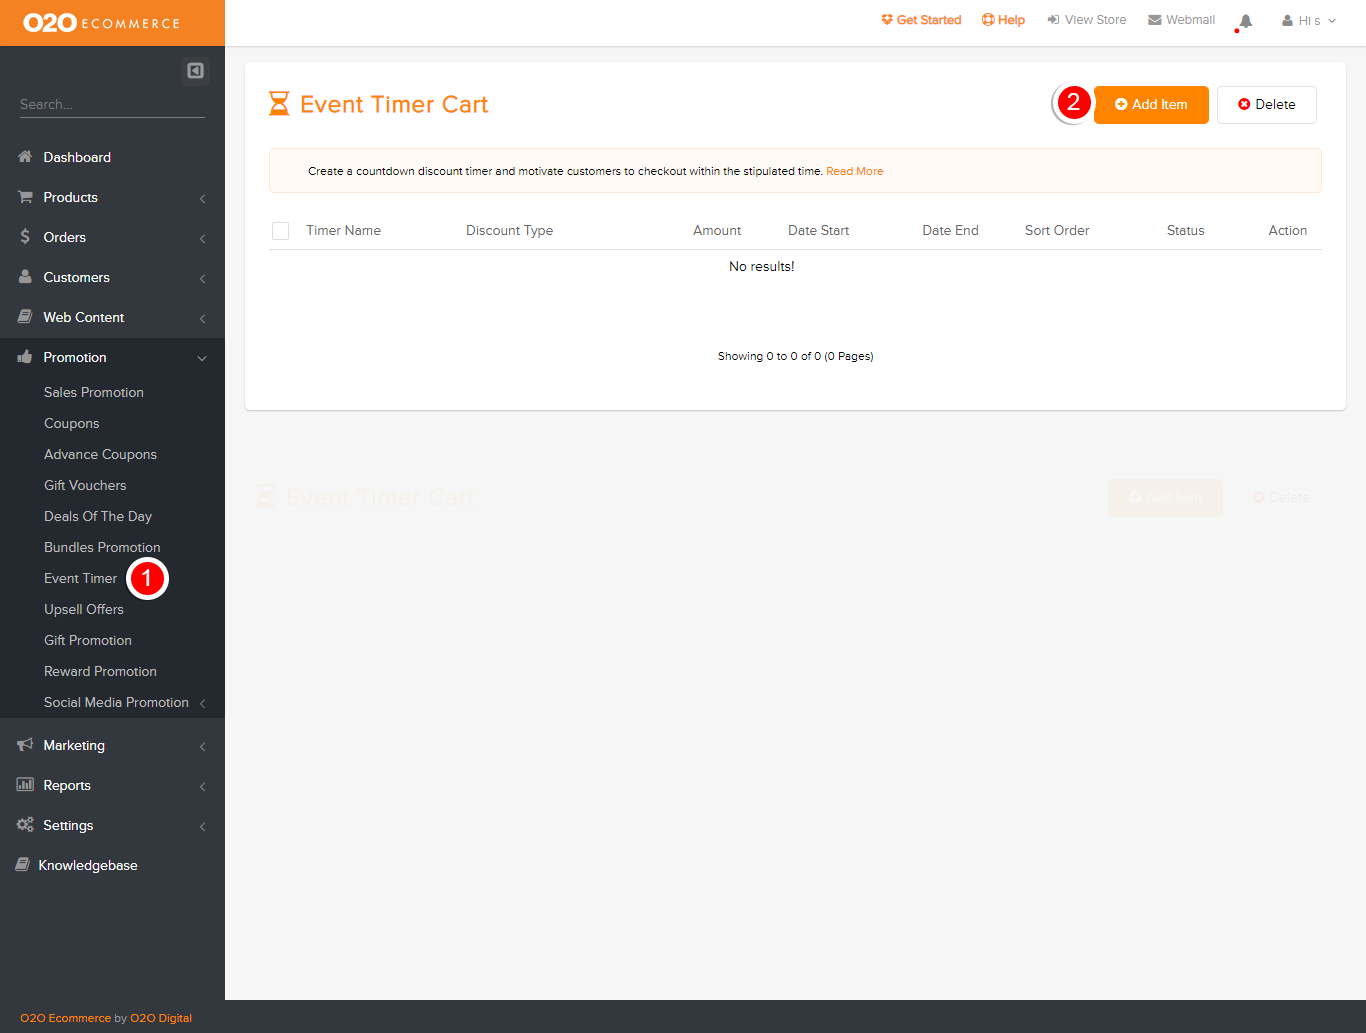
Then, the following page will be displayed.
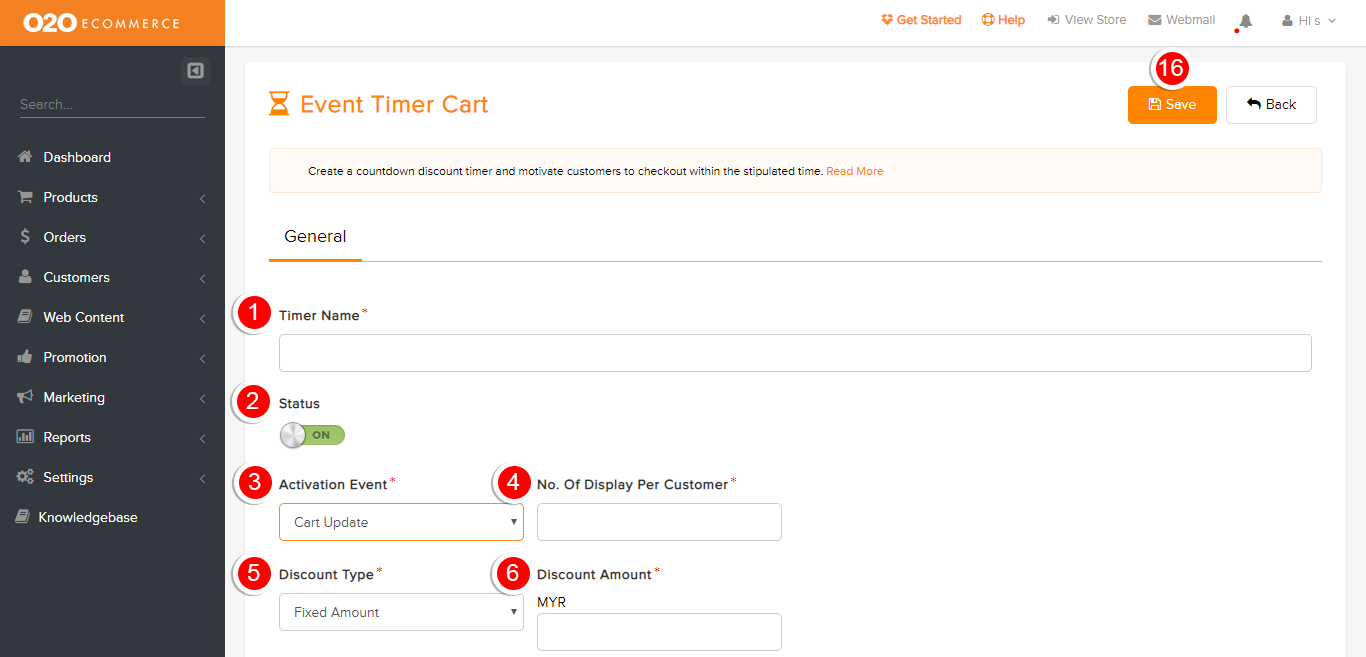
Description:
- Fill in the Timer Name
- Change Status to enable to display the event timer
- Activation event
- No. of Display Per Customer
- Discount Type
- Choose either fixed amount or percentage (e.g 10%)
- Discount Amount
- Determine the discount amount of the event
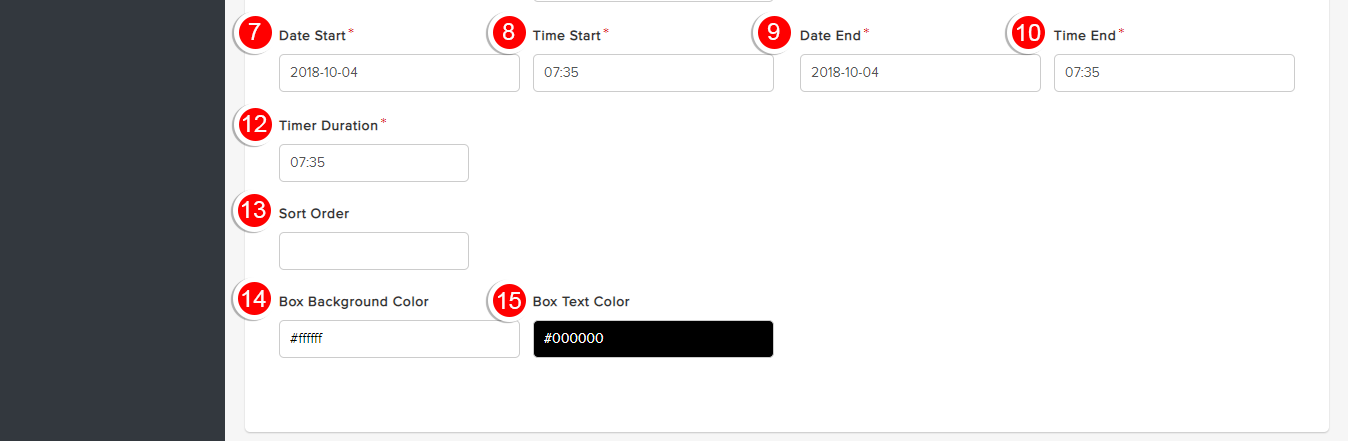
- Determine the Date Start
- Determine the Time Start
- Determine the Date End
- Determine the Time End
- Determine the Timer Duration
- Activation Event
- Sort Order
- Determine the display sequence of the event timer
- Box Backgroung color
- Choose the background color of the display box
- Box Text Color
- Choose the text color of the event timer
- Click Save
This is how it looks like in the store after a customer registers.

