Products > Products
To assign Product Options to specific product,
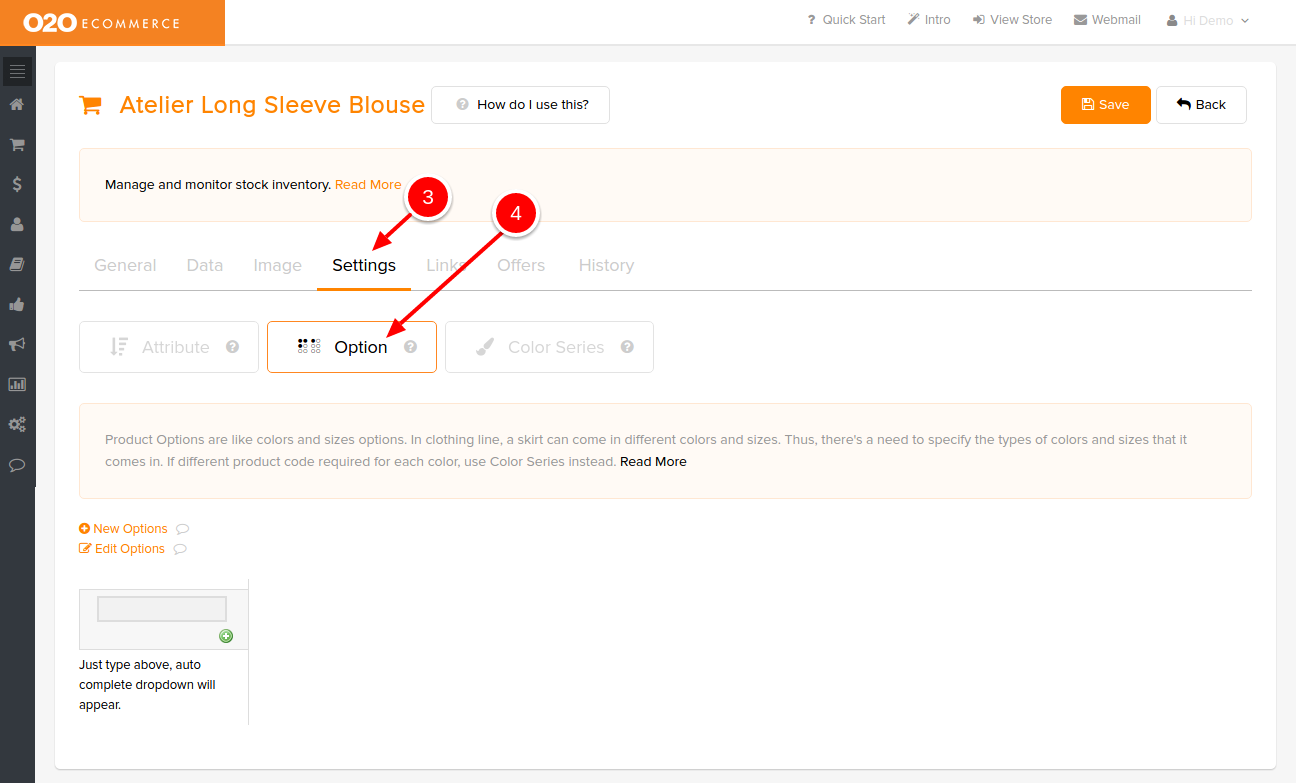
- Go to Products > Products
- Select the intended product to assign the Product Options
- Click on Settings tab
- Click on Option tab
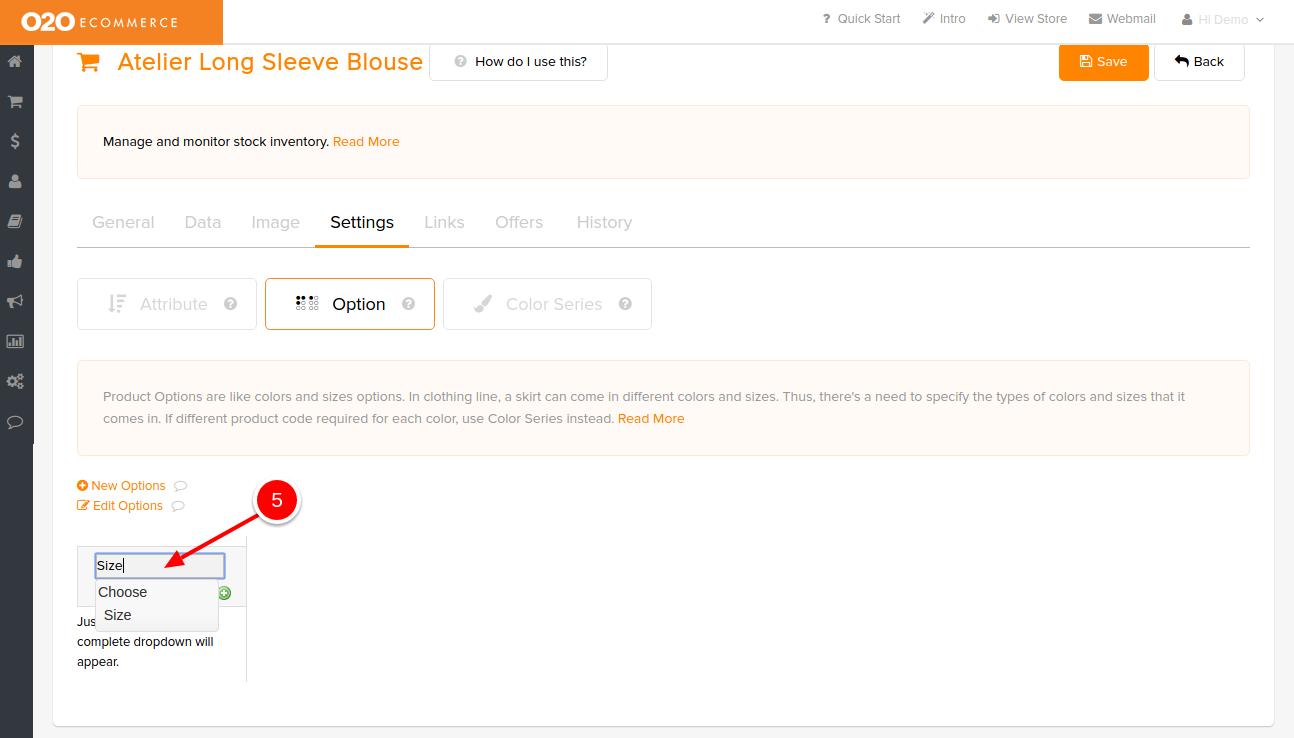
- Type the desired Option Name that you have created and select the desired Option Name from the drop-down menu
After an Option Name has been chosen, you will see the following page.

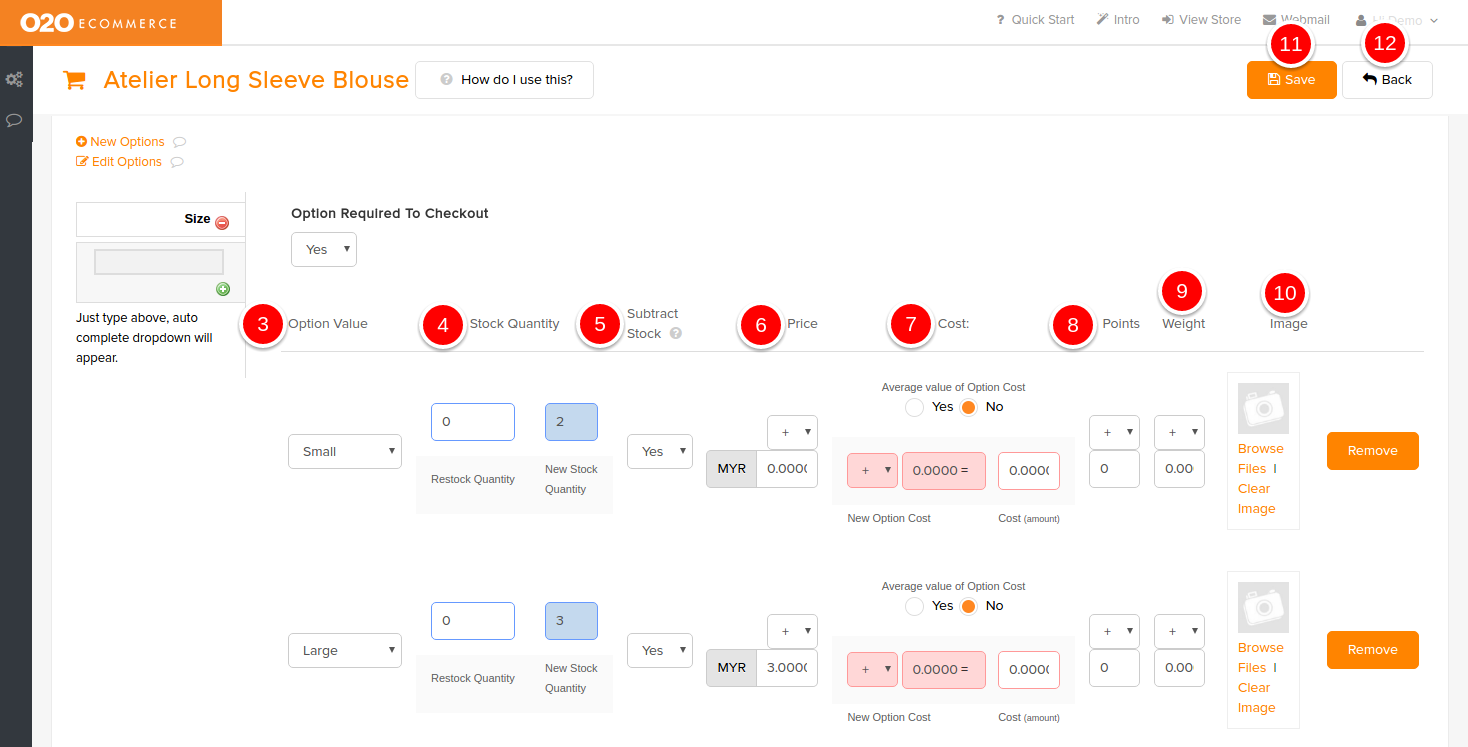
Descriptions :
- Option Required To Checkout
- Set to Yes if you want to make it a compulsory field for your customer to fulfill before adding to their shopping cart
- Add Option Value
- Click this to start adding Option Value
- Option Value
- Select the desired Option Value from the drop-down menu
- Stock Quantity
- Enter the available stock quantity for the selected Option Value
- Subtrack Stock
- Set to Yes if you want the system to subtrack the stock when there is an order being placed
- Price
- Input the amount of price increase/decrease respectively, leave it blank if there is no changes in pricing
- Cost
- Input the amount of cost increase/decrease respectively, leave it blank if there is no changes in costing
- Points
- Input the number of reward points increase/decrease respectively, if applicable
- Weight
- Enter the addition/reduction of weight respectively in order to have a more accurate shipping rate calculation
- Image
- Browse and select the intended image in the Image Manager that relates to the Option Value
- Save
- Click this to save and continue
- Back
- Click this to exit
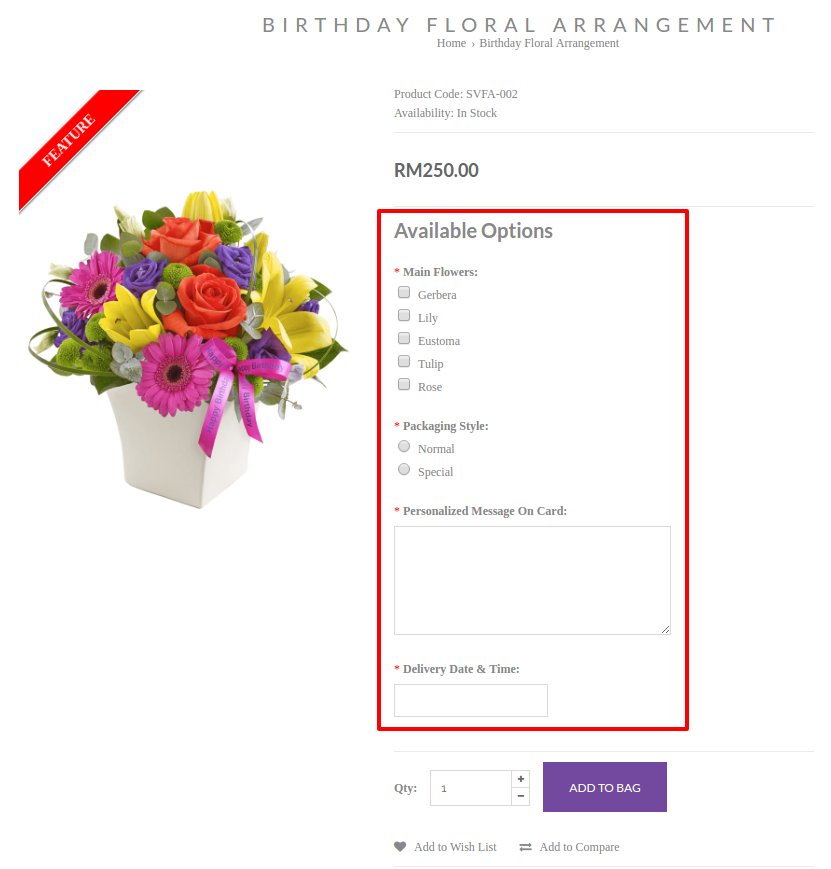
Sample Screenshots of Products Options in the store