Web Content > Text Block & Settings > Theme Options
Before setting up the Instagram Gallery in the store, you need to do the following first.
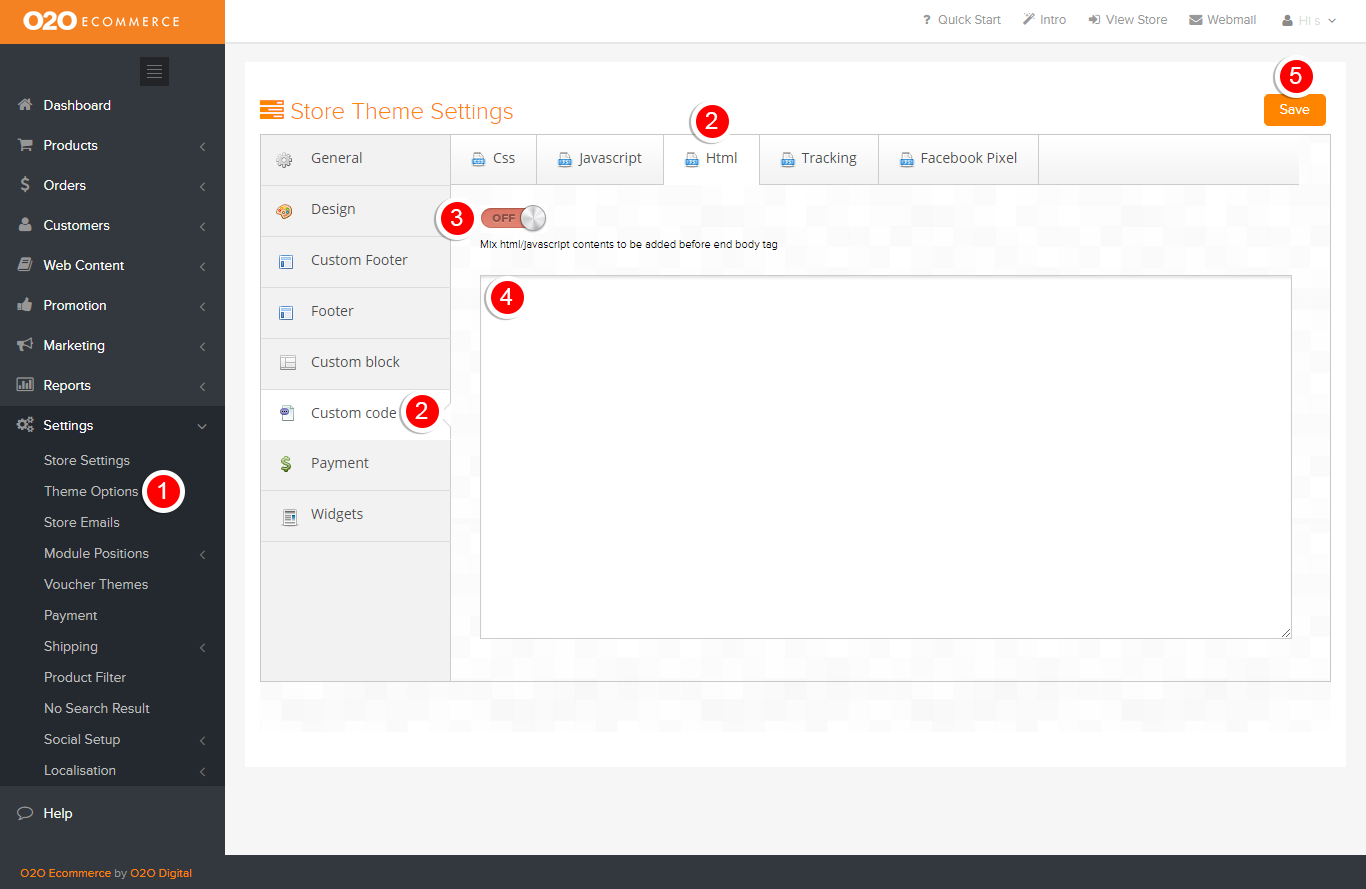
- Go to Settings > Theme Options
- Click on Custom Code tab then choose HTML tab
- Turn On the Status to enable this function
- Paste the following program code in the box field
- <script type="text/javascript" src="//lightwidget.com/widgets/lightwidget.js"></script>
- Note : If there are other program codes in the box field, please do not delete them unless you know what you are deleting. Just paste the above program codes in a new line.
- <script type="text/javascript" src="//lightwidget.com/widgets/lightwidget.js"></script>
- Click Save
Next, you will need to determine how you want the Instagram Gallery to appear in the store.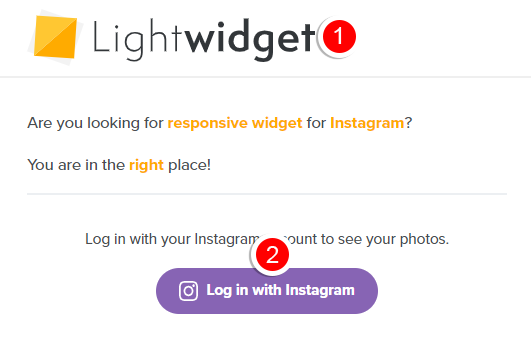
- Go to https://lightwidget.com/
- Login to your Instagram account to authorize the Lightwidget to create a widget for you (This only required to be done once.)
Description:
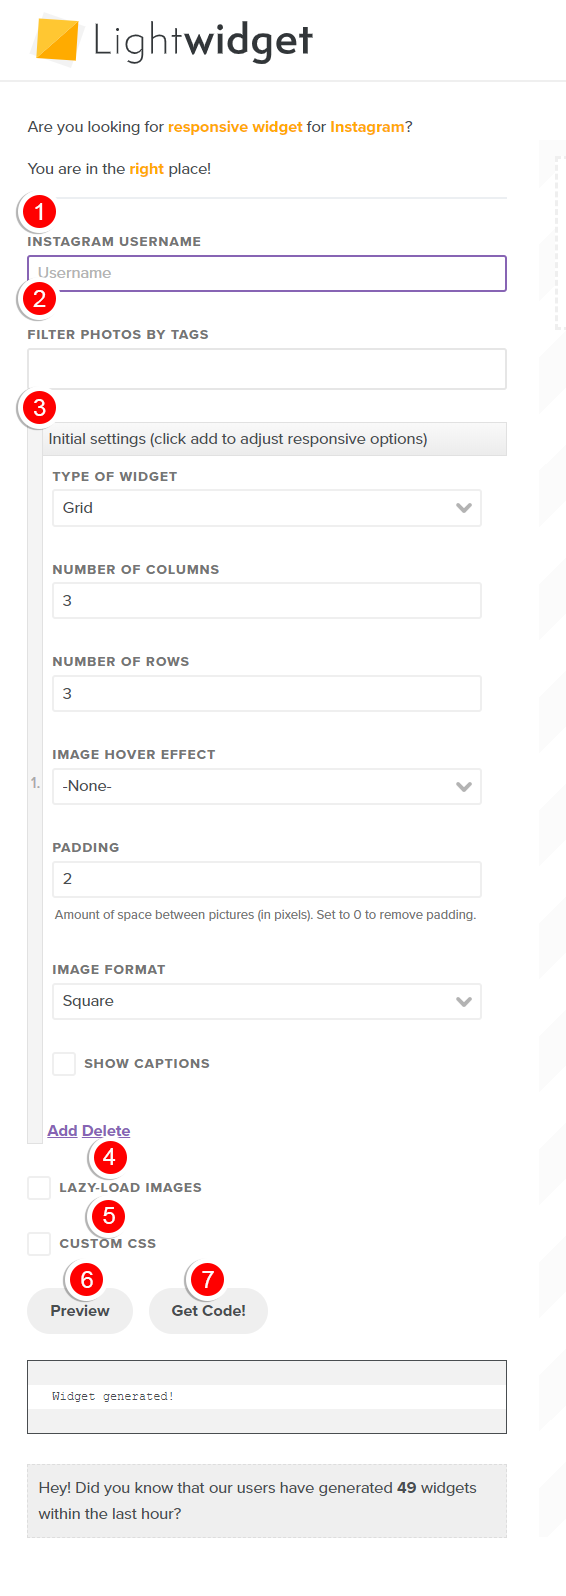
- Enter your Instagram Username
- Enter Tag if you want to filter images with the chosen tag (optional)
- Configure the way you want your Instagram Gallery to look like in Initial Settings
- Type of widget - choose either grid, slideshow or columns
- Number of columns - determine the number of columns
- Number of rows - determine the number of rows
- Image hover effect - choose the hover effect (mouse hover)
- Padding - determine the amount on space between images (in pixels)
- Image format - choose square to square crop all the images or original to display the image in original size/format
- Show Caption - click this to display the image's caption
- Check this box for Lazy Loading setting (optional)
- Check this box if you have Custom CSS code (optional)
- Click Preview
- Click Get Code! to copy code to clipboard
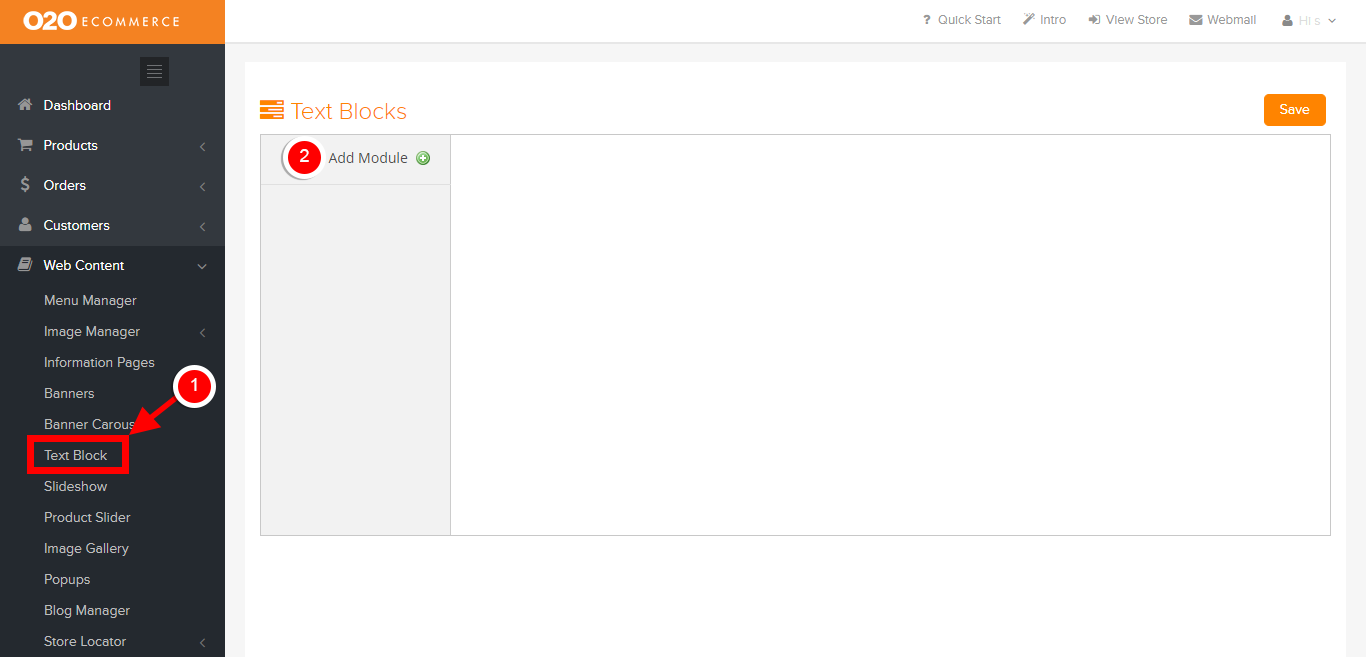
To set up Instagram Gallery in your store,
- Go to Web Content > Text Block
- Click Add Module to have a new module
Upon clicking Add Module, this page will appear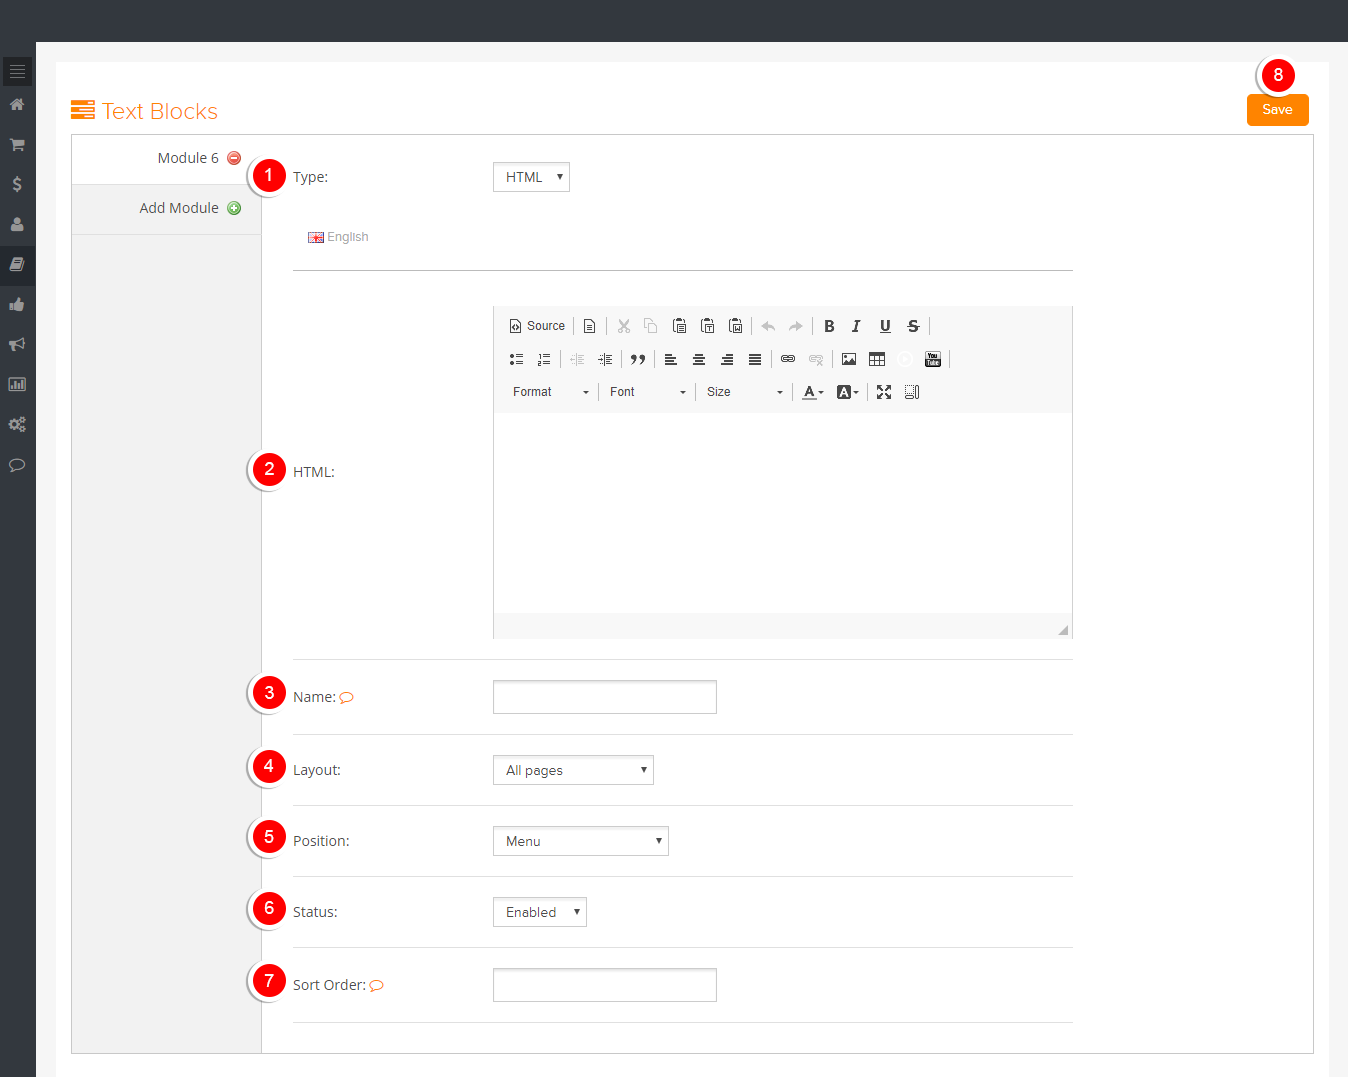
Description:
- Under Type, select HTML
- Click on Source, paste the program codes that you have copied earlier from Lightwidget here
- If you wish to have a preview on how it would look like or you would like to add a title to this Instagram Gallery
- Click on the Source again, and if required, add a title to it using the available formatting here
- Give a Name to the module for easy reference and maintenance in the future (e.g. Instagram Gallery)
- Choose which Page to display the gallery
- Determine the Position of the gallery in the chosen page
- Choose Enable for status to display the gallery
- Determine the display sequence in ascending order
- Click Save
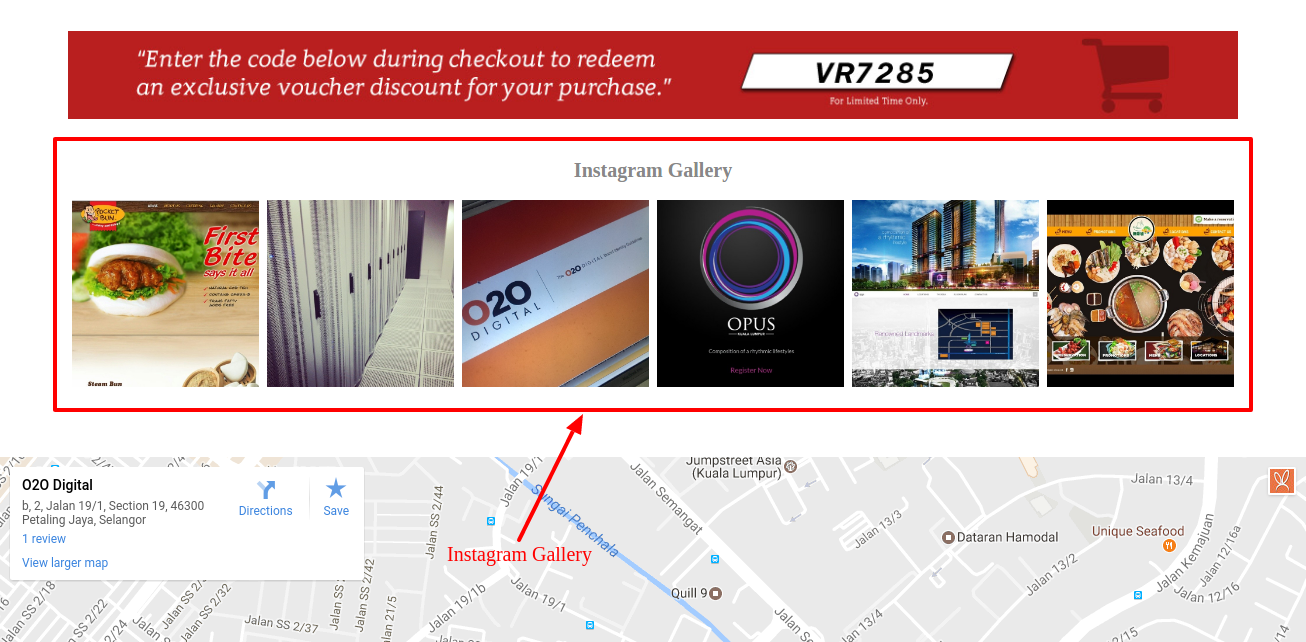
Sample Screenshot of Instagram Gallery in the store