Promotion > Event Timer
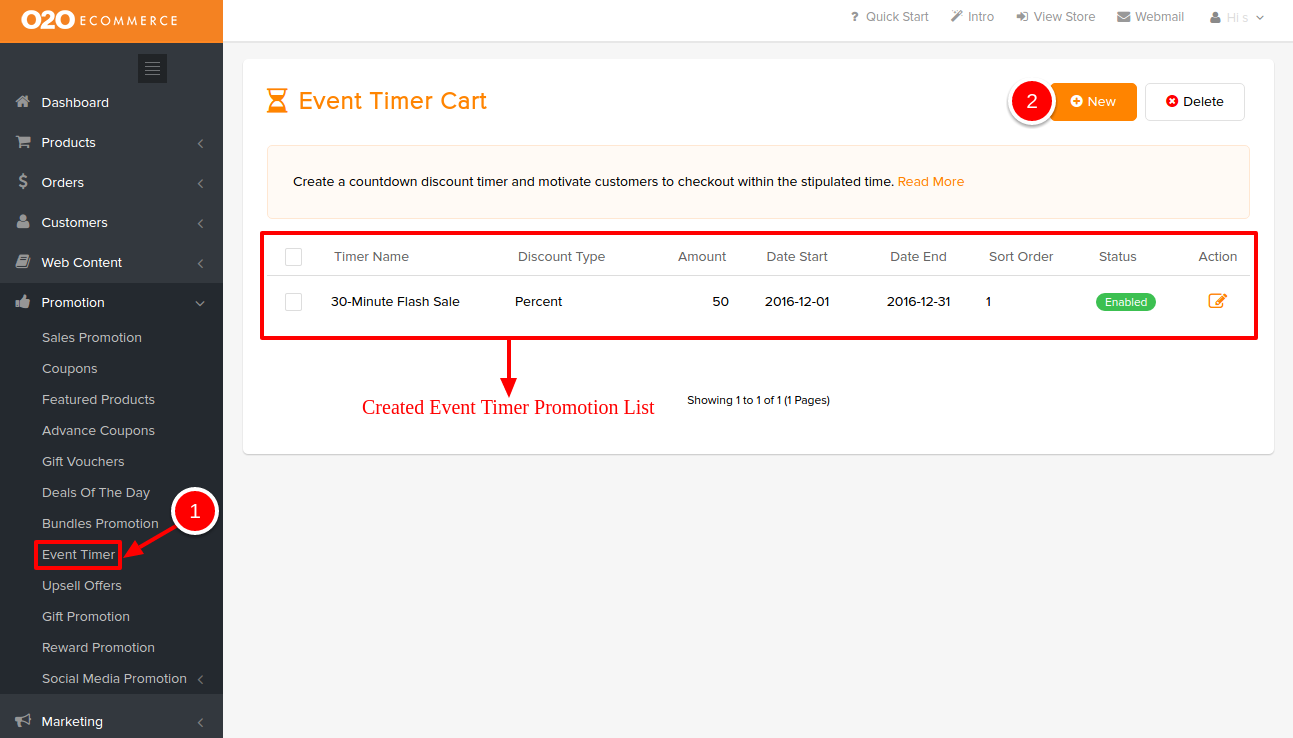
To create an Event Timer,
- Go to Promotion > Event Timer
- Click New

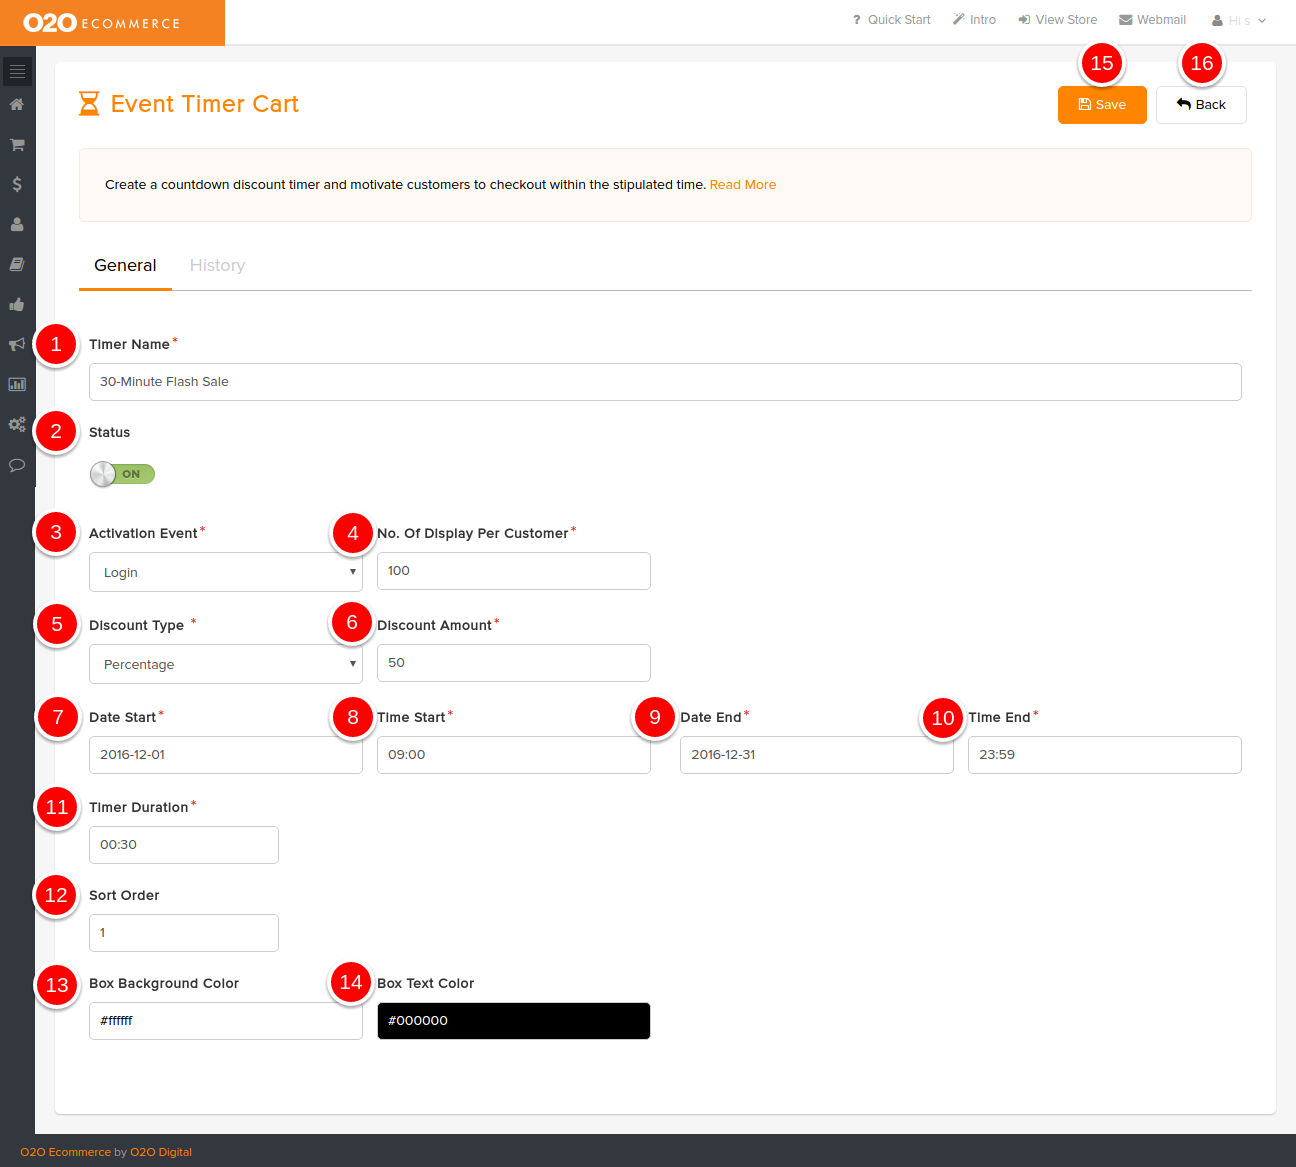
Then, you will directed to the following page.
Descriptions :
- Timer Name
- Enter a name for the Event Timer. This will be shown in the checkout page.
- Status
- Turn this to On when you want to run this promotion
- Turn this to On when you want to run this promotion
- Activation Event
- Determine the type of event that will trigger this Event Timer (upon Cart Update, Order Place, Login or New Registration)
- No. Of Display Per Customer
- Define the maximum no. of times the customers will be offered with the Event Timer Promotion
- Discount Type
- Determine the type of discount that you would like to have (Percentage or Fixed Amount)
- Discount Amount
- Determine the amount of discount that you would like to give after determining the Discount Type (Percentage or Fixed Amount)
- Date Start
- Determine the date to start running this promotion
- Time Start
- Determine the time to start running this promotion (e.g. 22:00 to indicate 10.00pm)
- Date End
- Determine the date to end this promotion
- Time End
- Determine the time to end this promotion (e.g. 22:00 to indicate 10.00pm)
- Timer Duration
- Set the countdown timer period (e.g. 00:30 for 30 minutes duration). The customers will need to checkout within this time frame to enjoy the discount.
- Sort Order
- Arrange the display sequence of Event Timers in the store by assigning numbers in ascending order
- Box Background Color
- Define the background color of the Event Timer box
- Box Text Color
- Define the font color in the Event Timer box
- Save
- Click to save and continue
- Back
- Click to exit
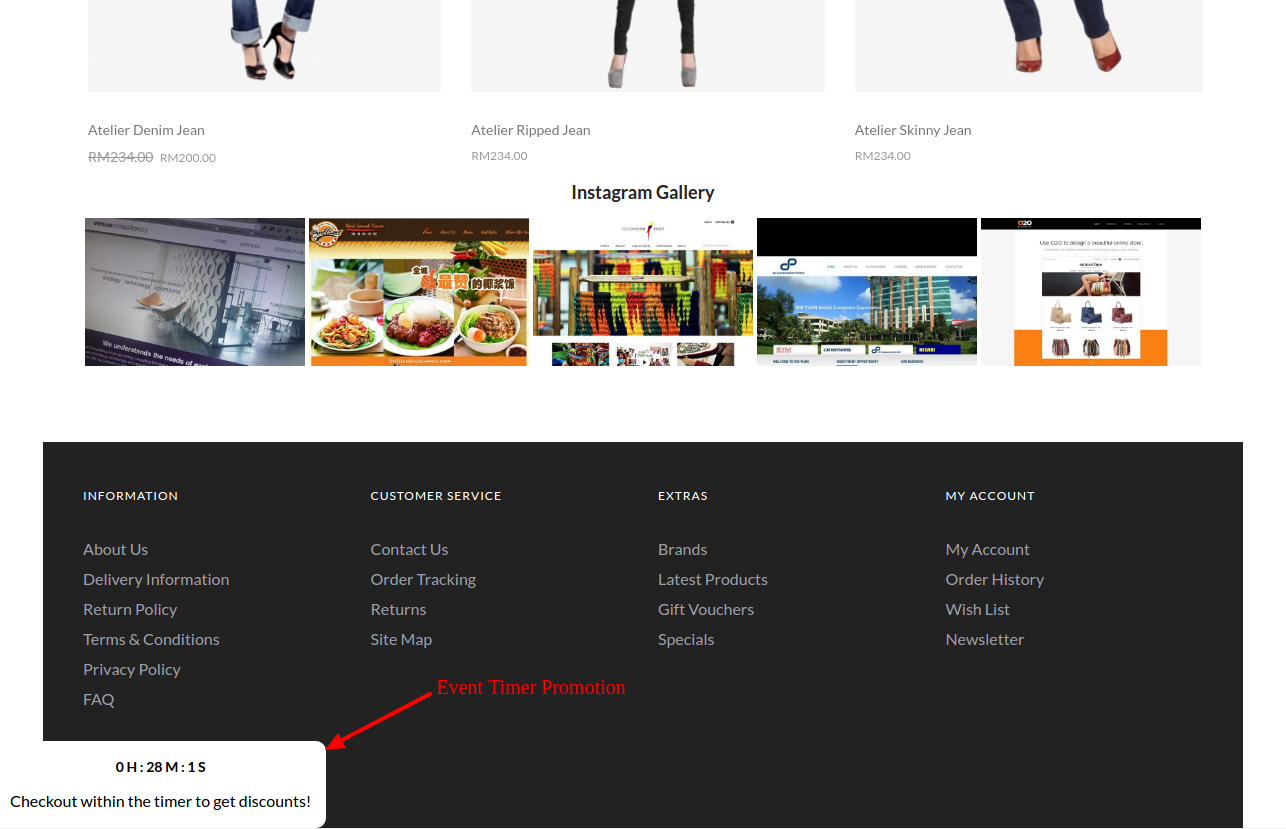
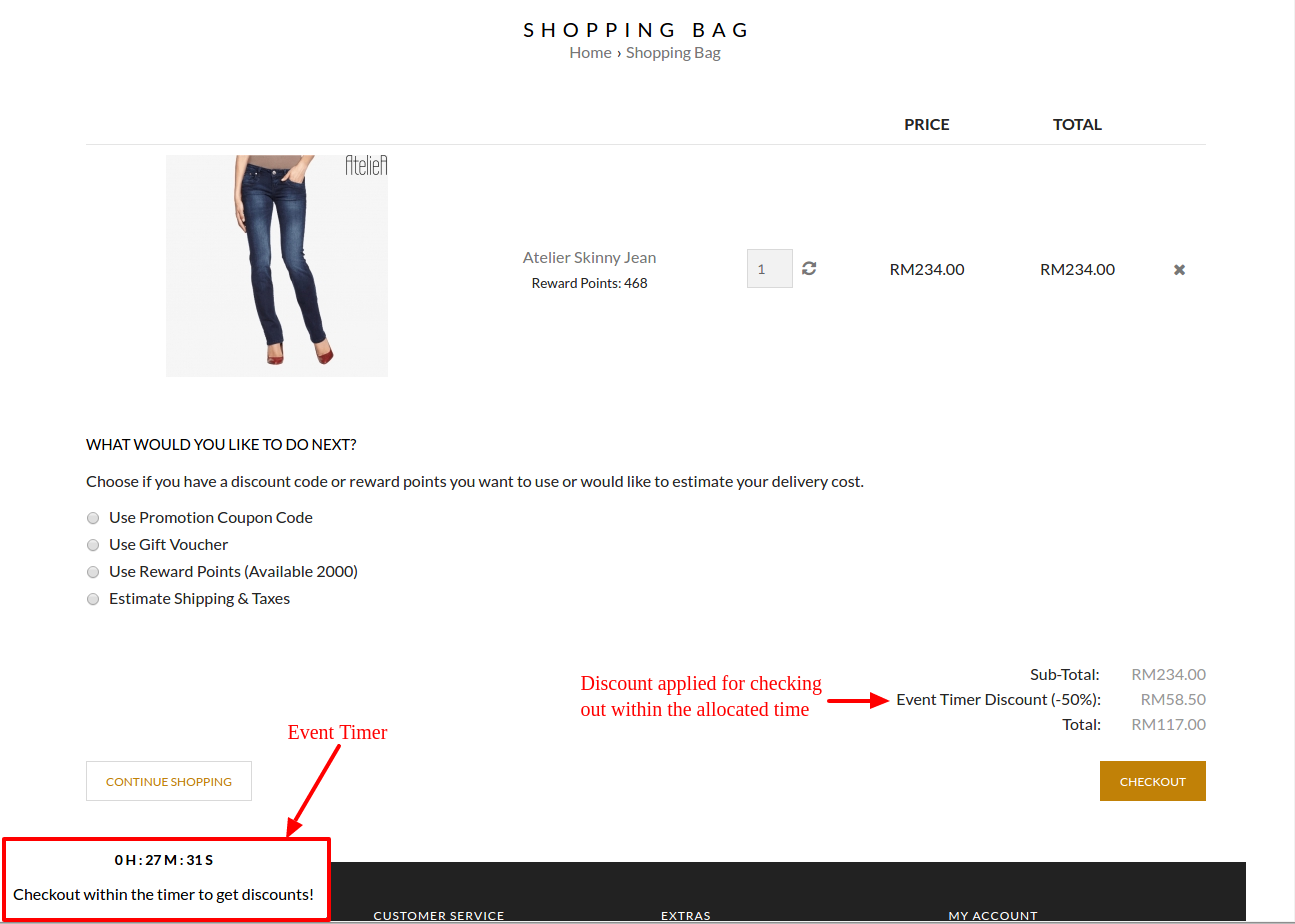
Sample Screenshots of Event Timer in the store


