Web Content > Image Gallery
To create an Image Gallery,
- Go to Web Content > Image Gallery
- Click on Add Album
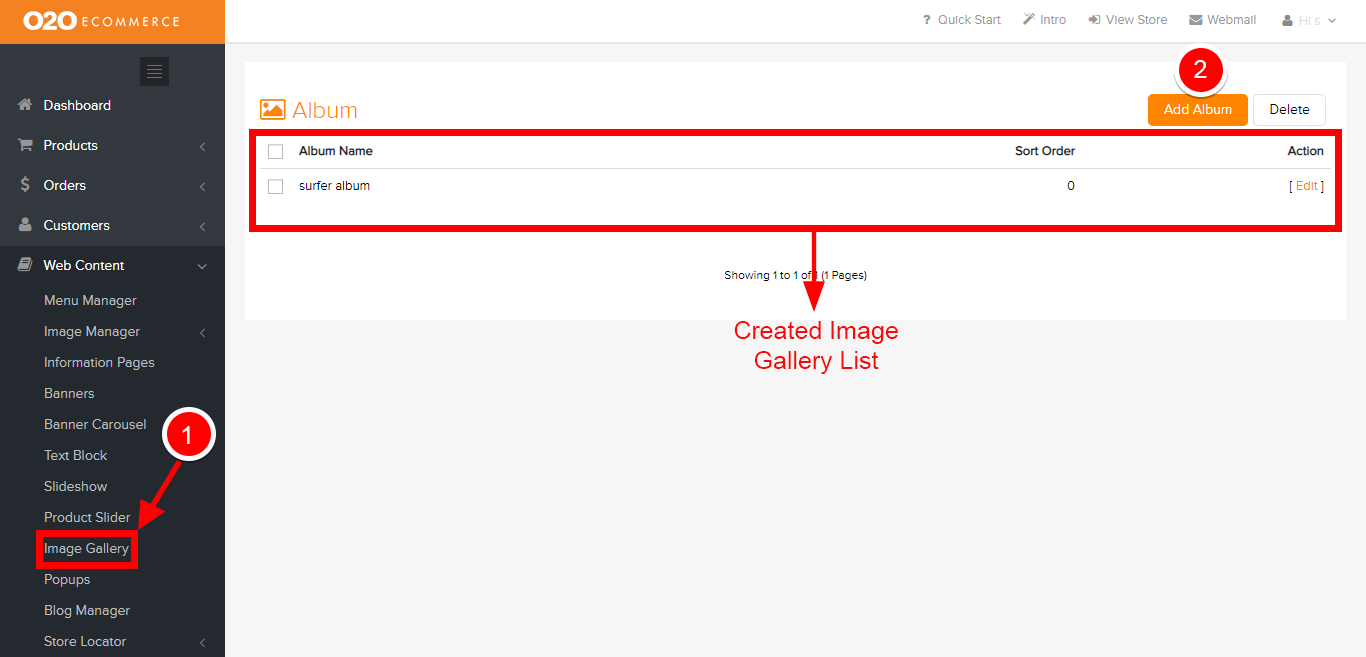

Then, the following page will be displayed.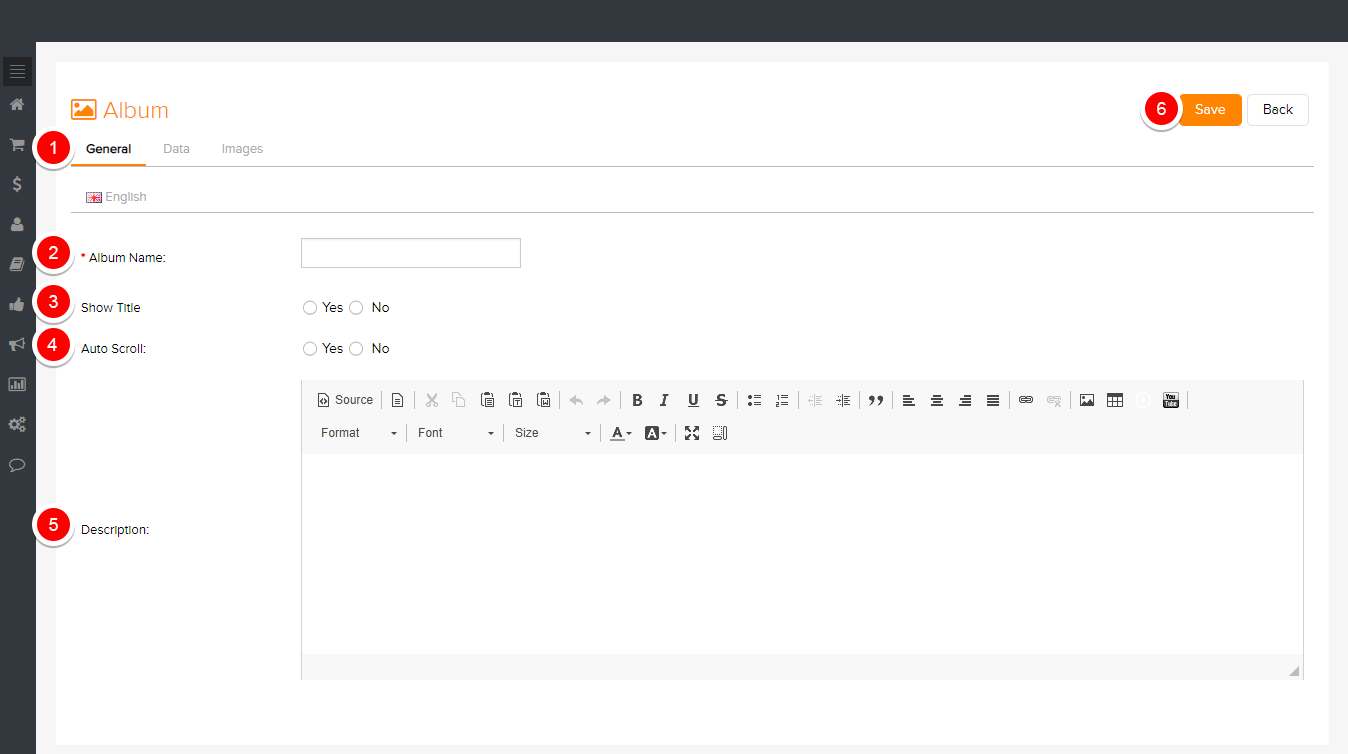
Descriptions :
- Make sure you are at the General tab
- Album Name
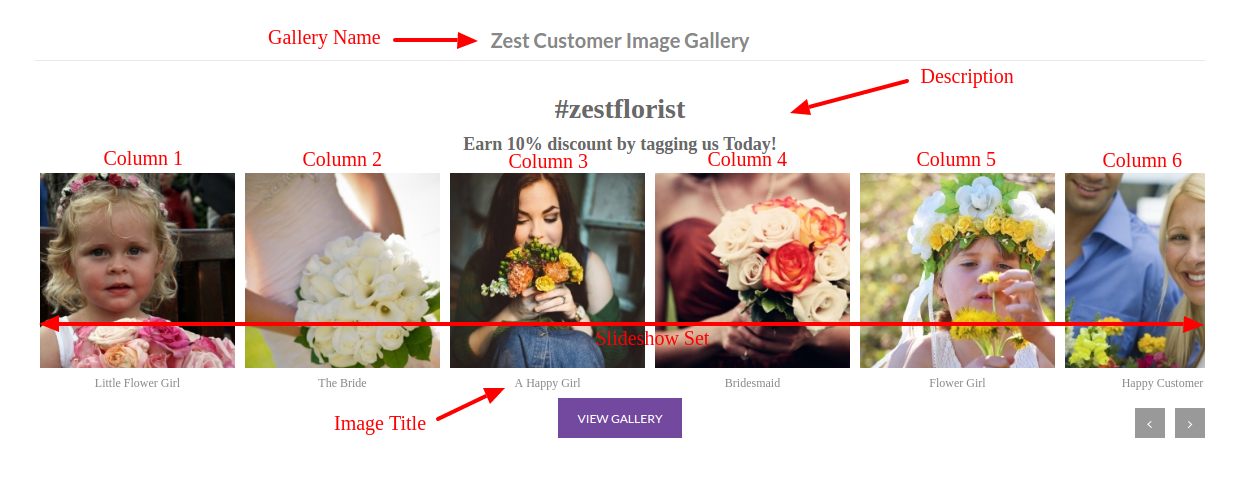
- Enter a name for this Image Gallery. This name will only be displayed in the store if the Show Title is turned On.
- Show Title
- Turn to On if you want to display the Gallery Name in the store
- Auto Scroll
- Turn to On if you want the images in this gallery to be showcased in an indefinite loop. Turn to Off and your customer will need to manual scroll the images.
- Description
- Enter information to be displayed on top of the images, if applicable
- Save
- Click to save
Next, the Data tab.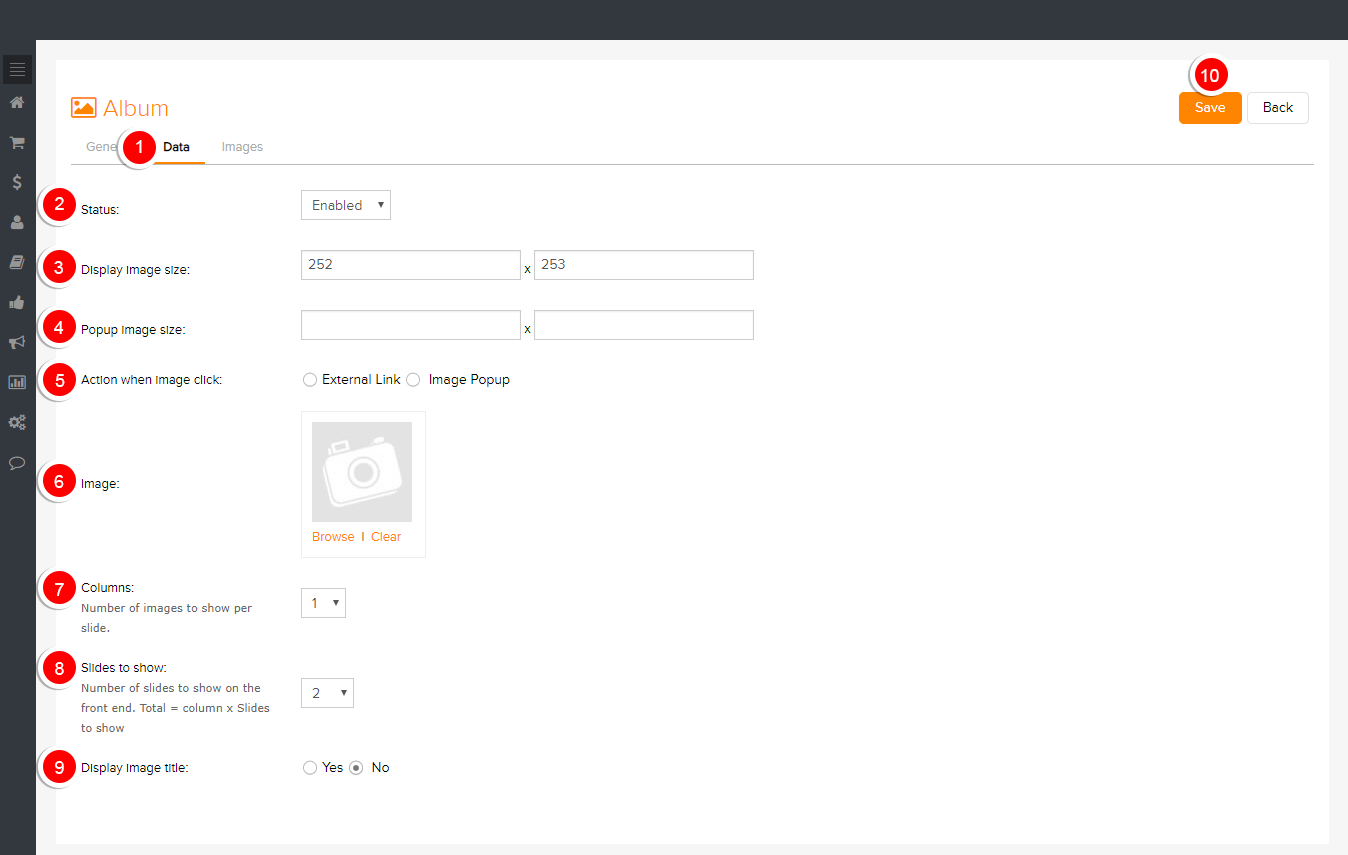
Descriptions :
- Click on Data tab
- Status
- Change to Enable when you want to display it in the store
- Display Image Size (W x H)
- Determine the size of image to be displayed in the store
- Popup Image Size (W x H)
- Determine the size of image in popup window (only applicable if Image Popup in Action When Click On Image is selected)
- Action When Click On Image
- Select either link to an External Link or have an Image Popup when the images in the gallery is being clicked on
- Image
- Browse and select image to be uploaded
- Columns
- Define the number of images per slide set
- No. Of Slide Sets To Show
- Define the number of slide sets to show in the store
- Display Image Title
- Select Yes to display the title of each images. It will be displayed below of each images
- Save
- Click to save
- Click to save
Finally, the Images tab.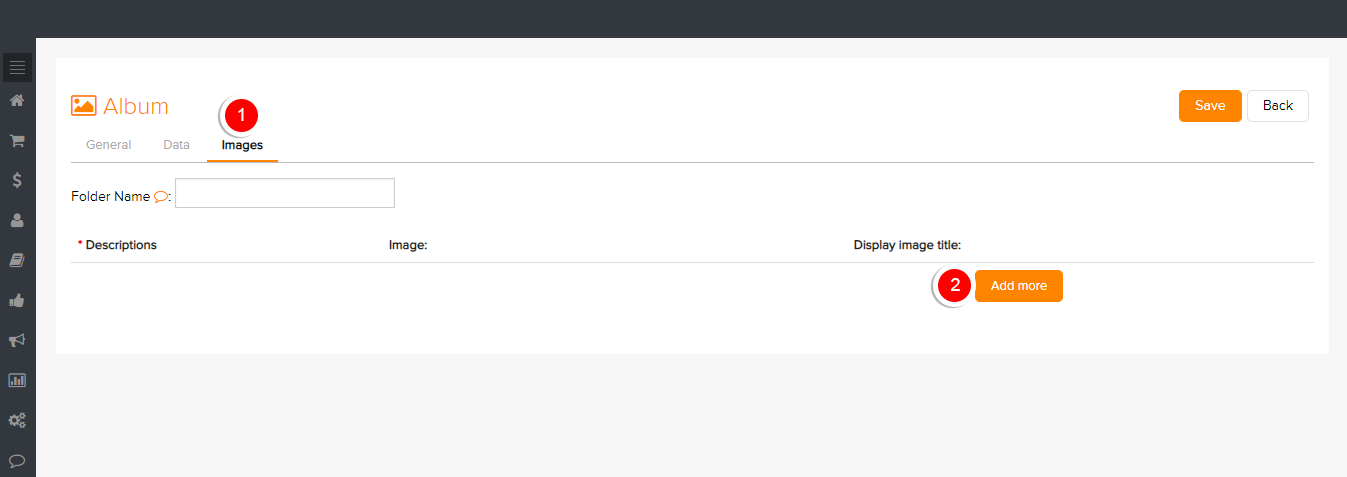
Descriptions :
- Click on Images tab
- Add More
- Click here to start adding images one-by-one
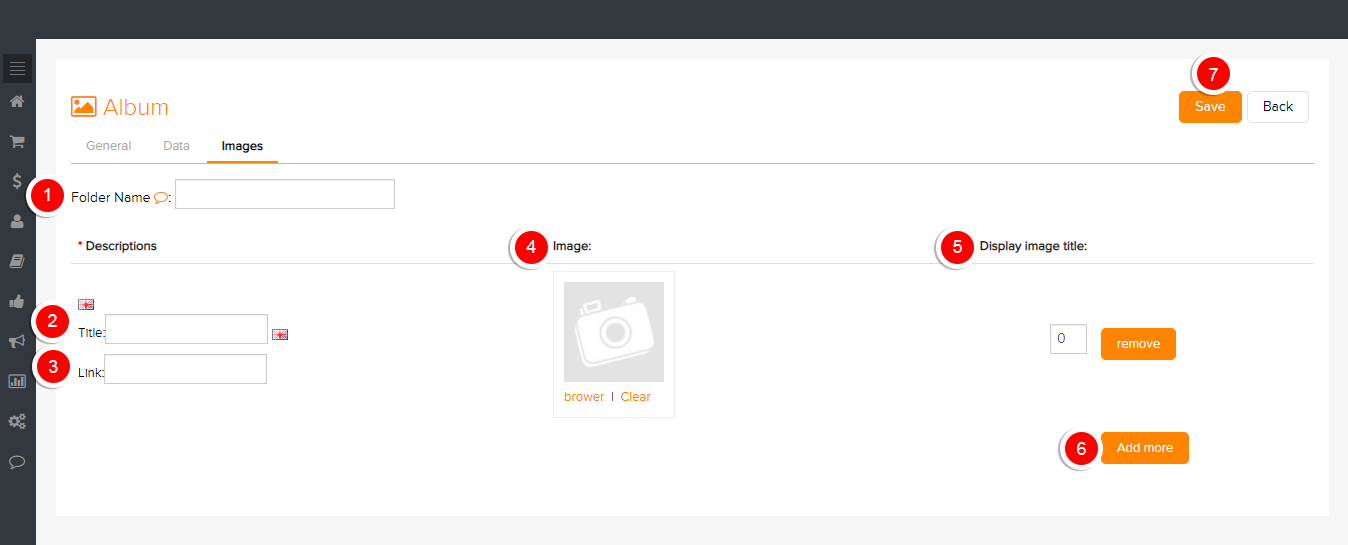
Descriptions :
- Folder Name
- Enter a name for the respective image folder
- Title
- Enter a title for the respective image, if applicable
- Link
- Input a URL link to the respective image, if applicable
- Image
- Browse and select the intended image from the Image Manager
- Display image title (Sort Order)
- Arrange the display sequence of the images in the gallery by assigning numbers in ascending order
- Add More
- Click here to add more images
- Save
- Click to save and continue

